Building that special place takes some thought and planning. Here’s what I learned when I built my very own studio.
I built a studio in about a month (with lots of help), using mostly reclaimed material. I wanted a quiet space with lots of light, tucked behind another building on our property in Jackson Hole, Wyoming for privacy. It’s my dream studio.
Do some Research and Dream a little before you build your Studio
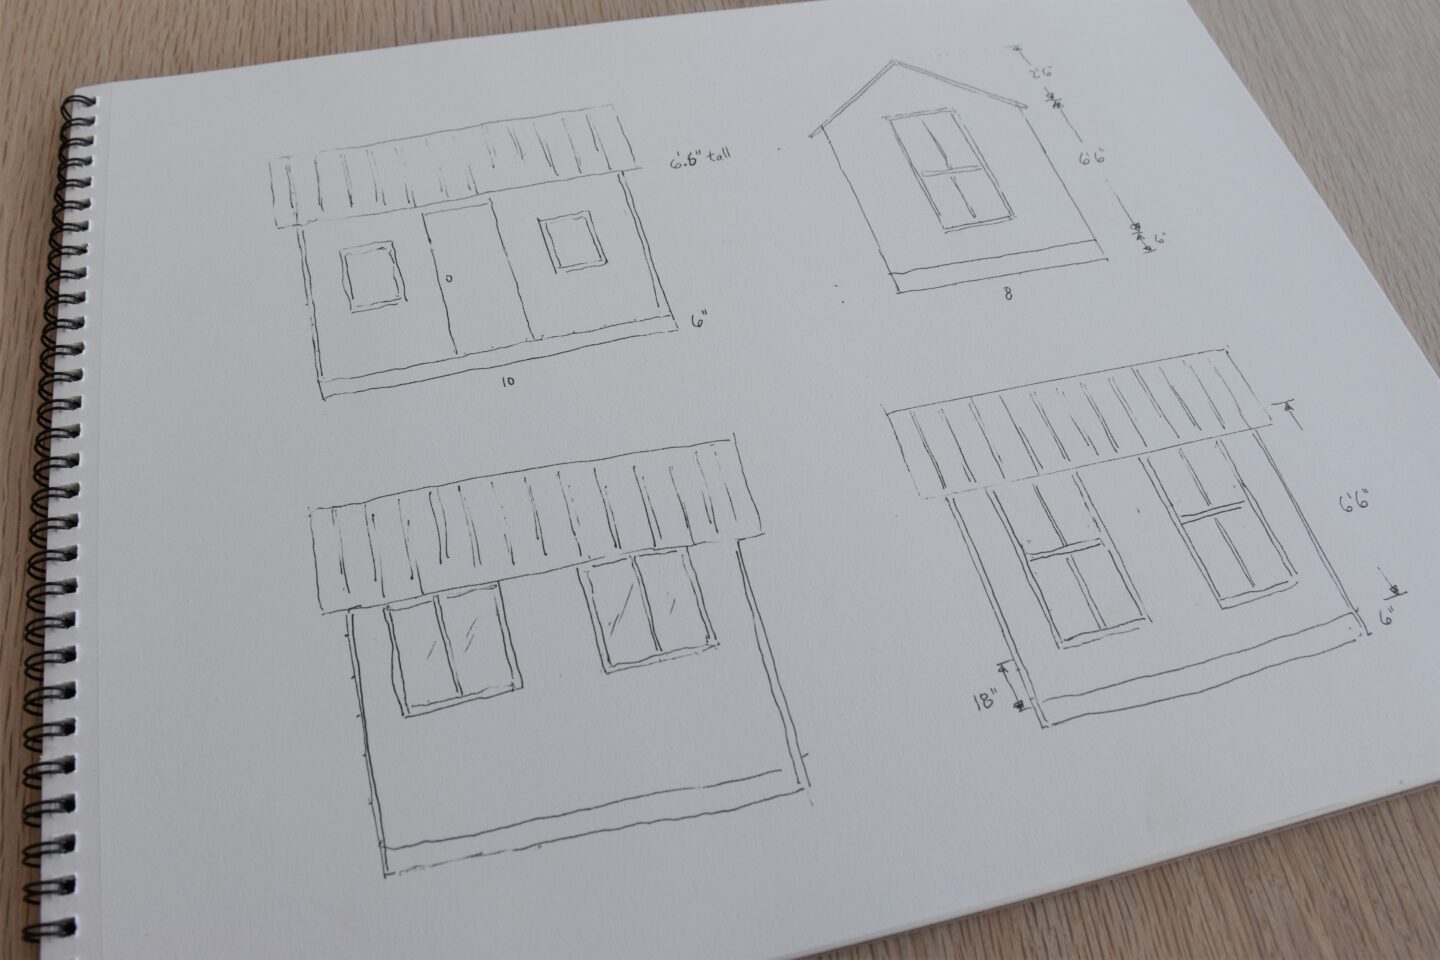
Before you Build – Make a Plan and a Sketch.
My sketch helped me visualize the studio and figure out how tall I wanted the building to be. I didn’t need 8′ walls. I decided to make the walls 6 1/2 feet tall. I’m 5’9″ so that’s plenty tall, plus the vaulted ceiling. A small building like this would have looked, and felt, out of proportion with 8′ tall walls in my opinion.
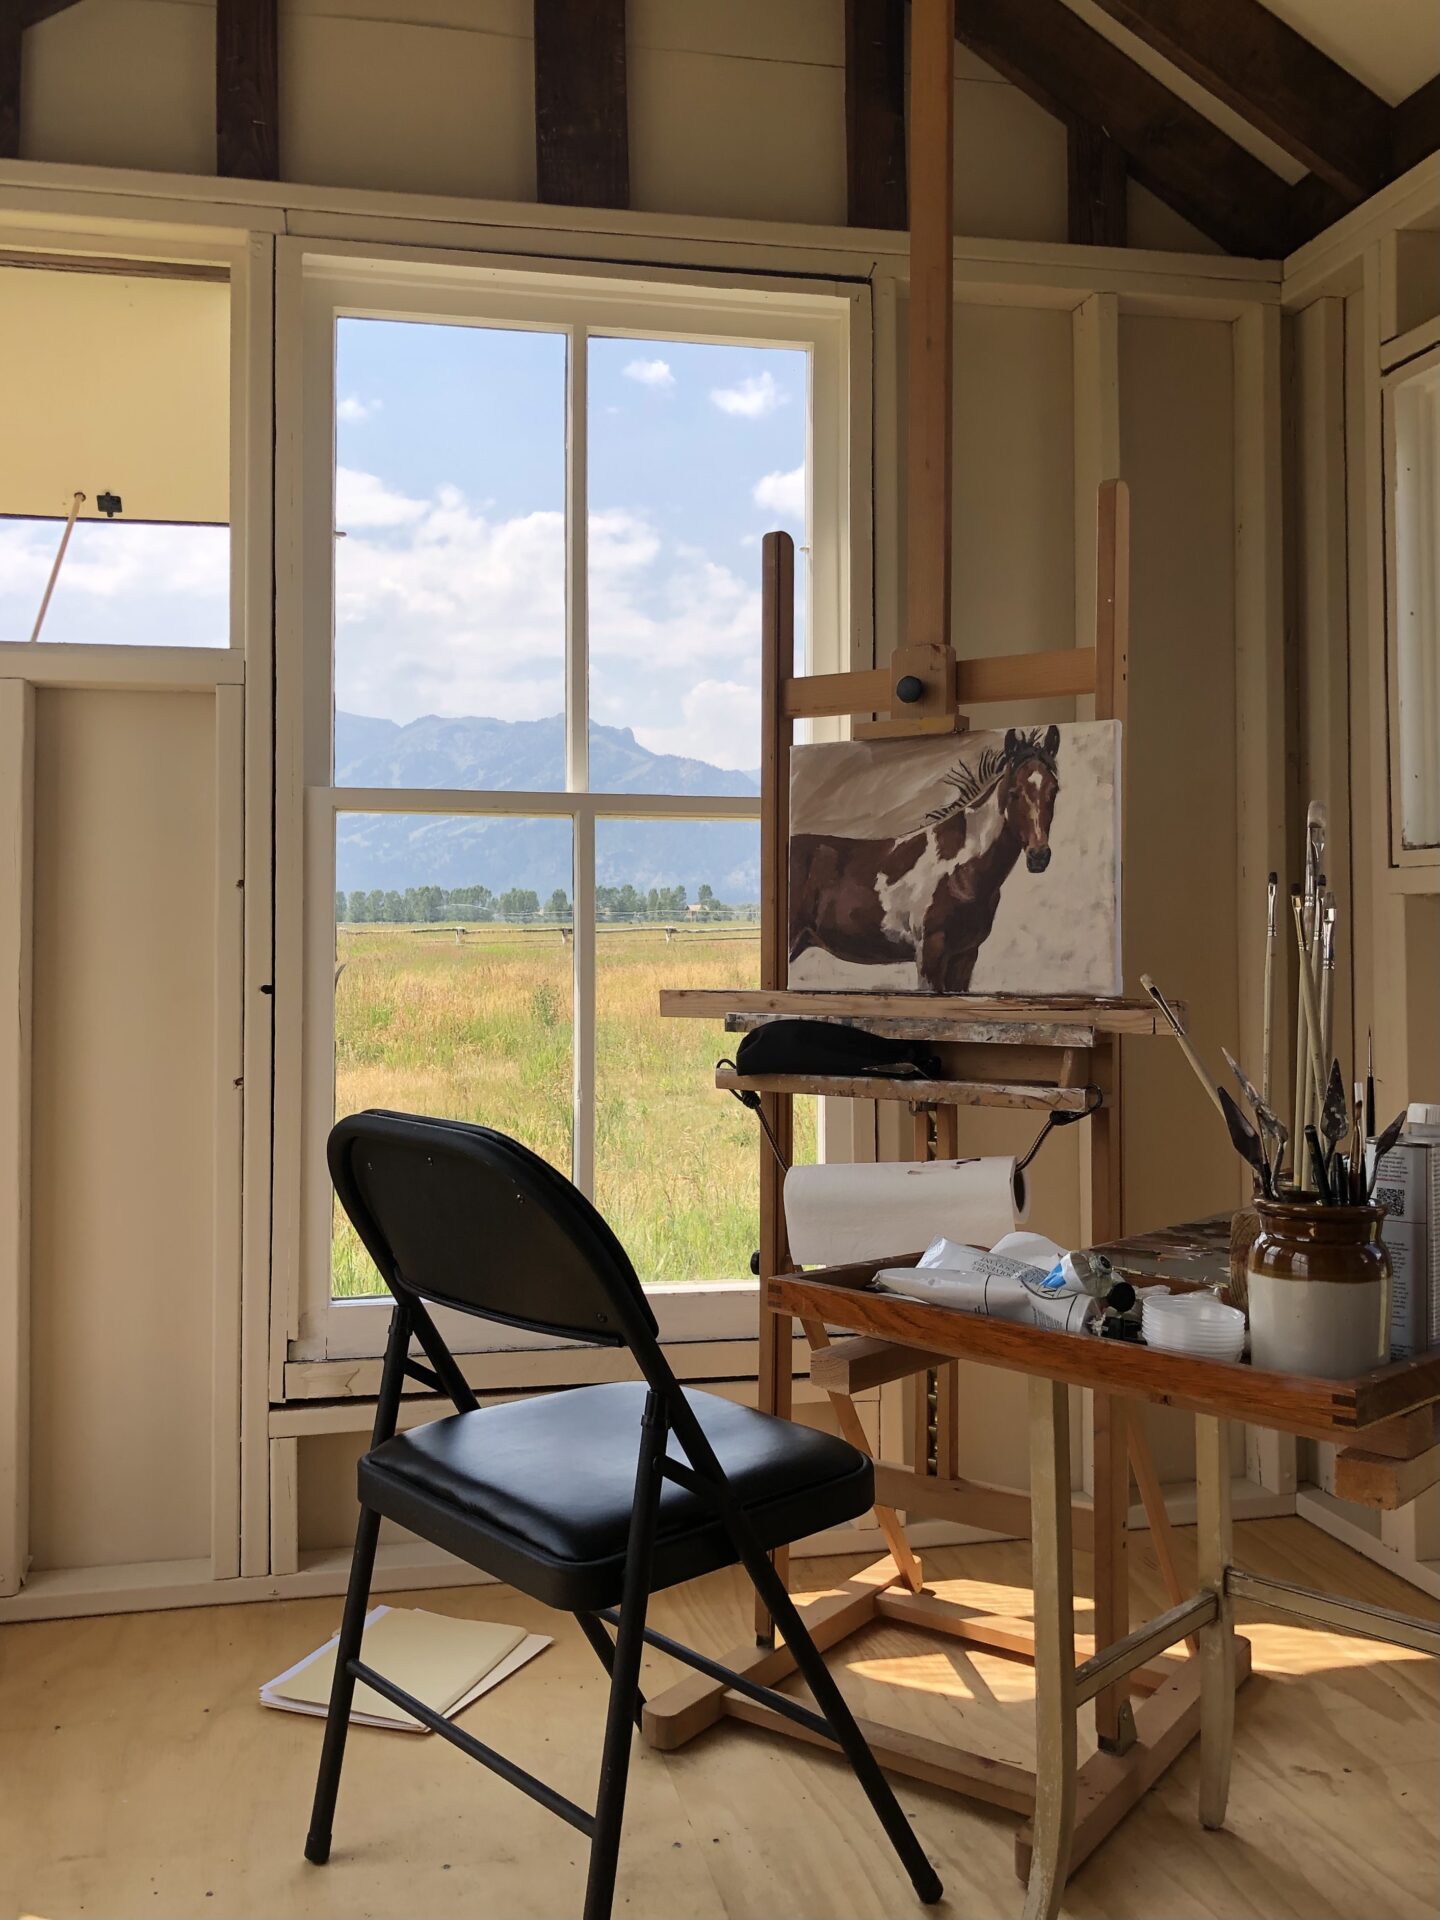
My studio is 8’x10′, just big enough for my easel and a small table with my pochade box on it. Plus a corner for a comfy chair. That’s all I need when I paint and I wanted to keep this new space uncluttered. All my art supplies (extra canvas, extra paint, frames, books, it’s a long list) are kept somewhere else.
Building an art studio – My Experience
Sourcing Reclaimed Materials to Build a Studio
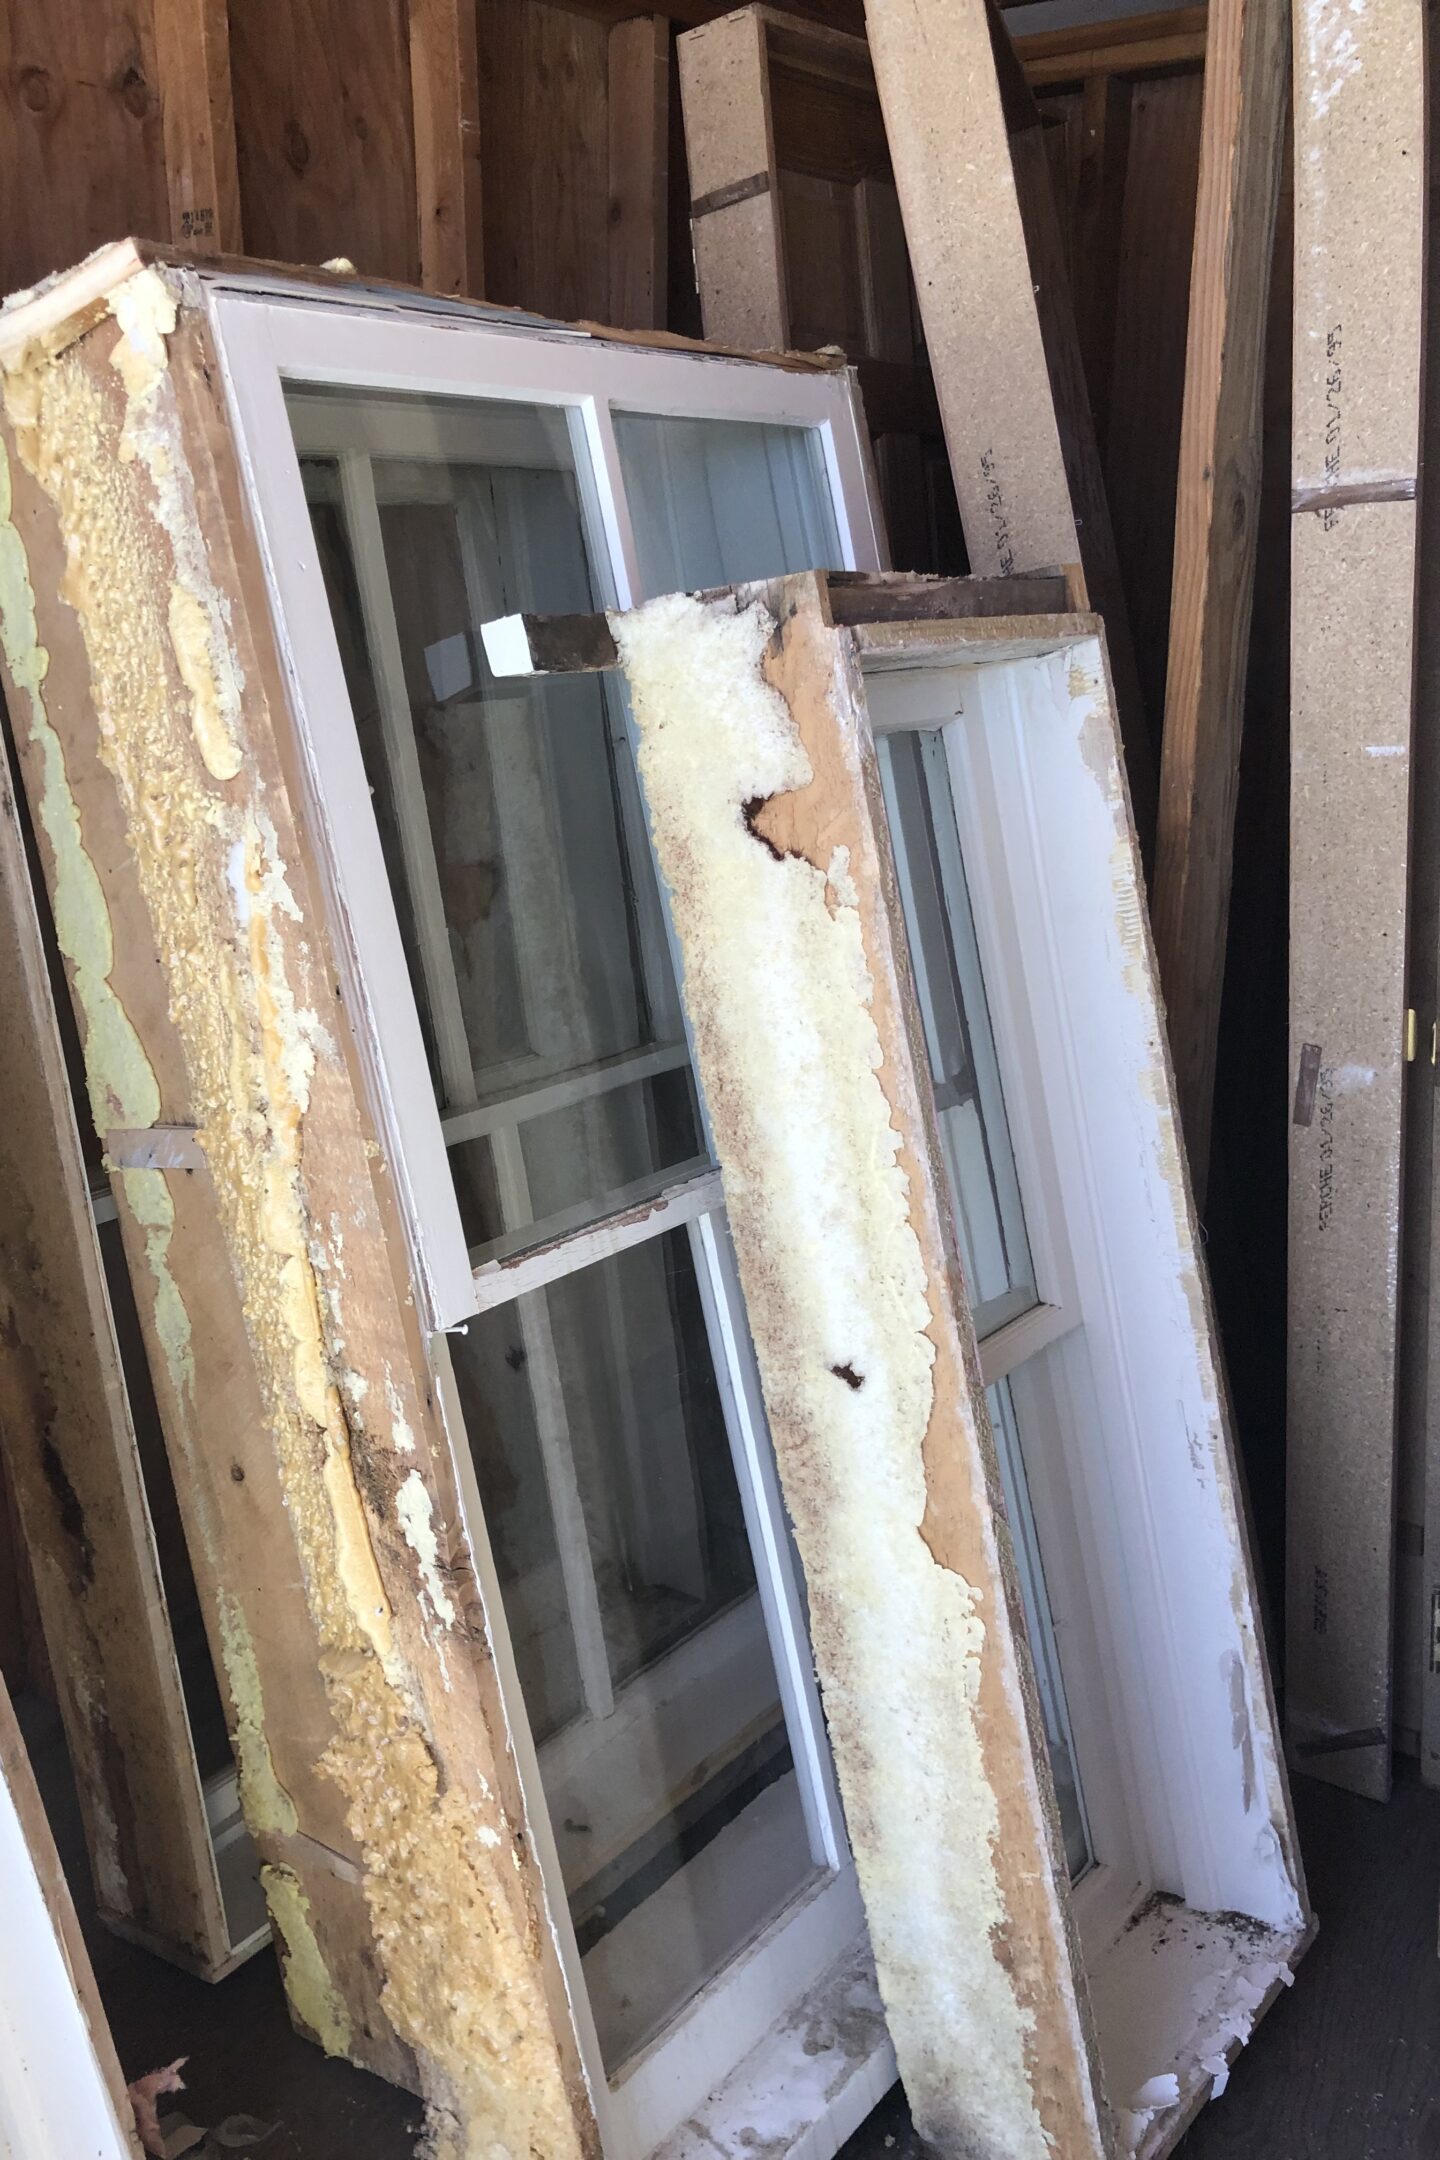
This project really came together in the beginning when I found some wonderful 100 year old wavy windows at our local Habitat for Humanity store. Much of the design hinged on these windows: their number and their size. Their size being huge, it took three trips to get the windows home in our SUV.
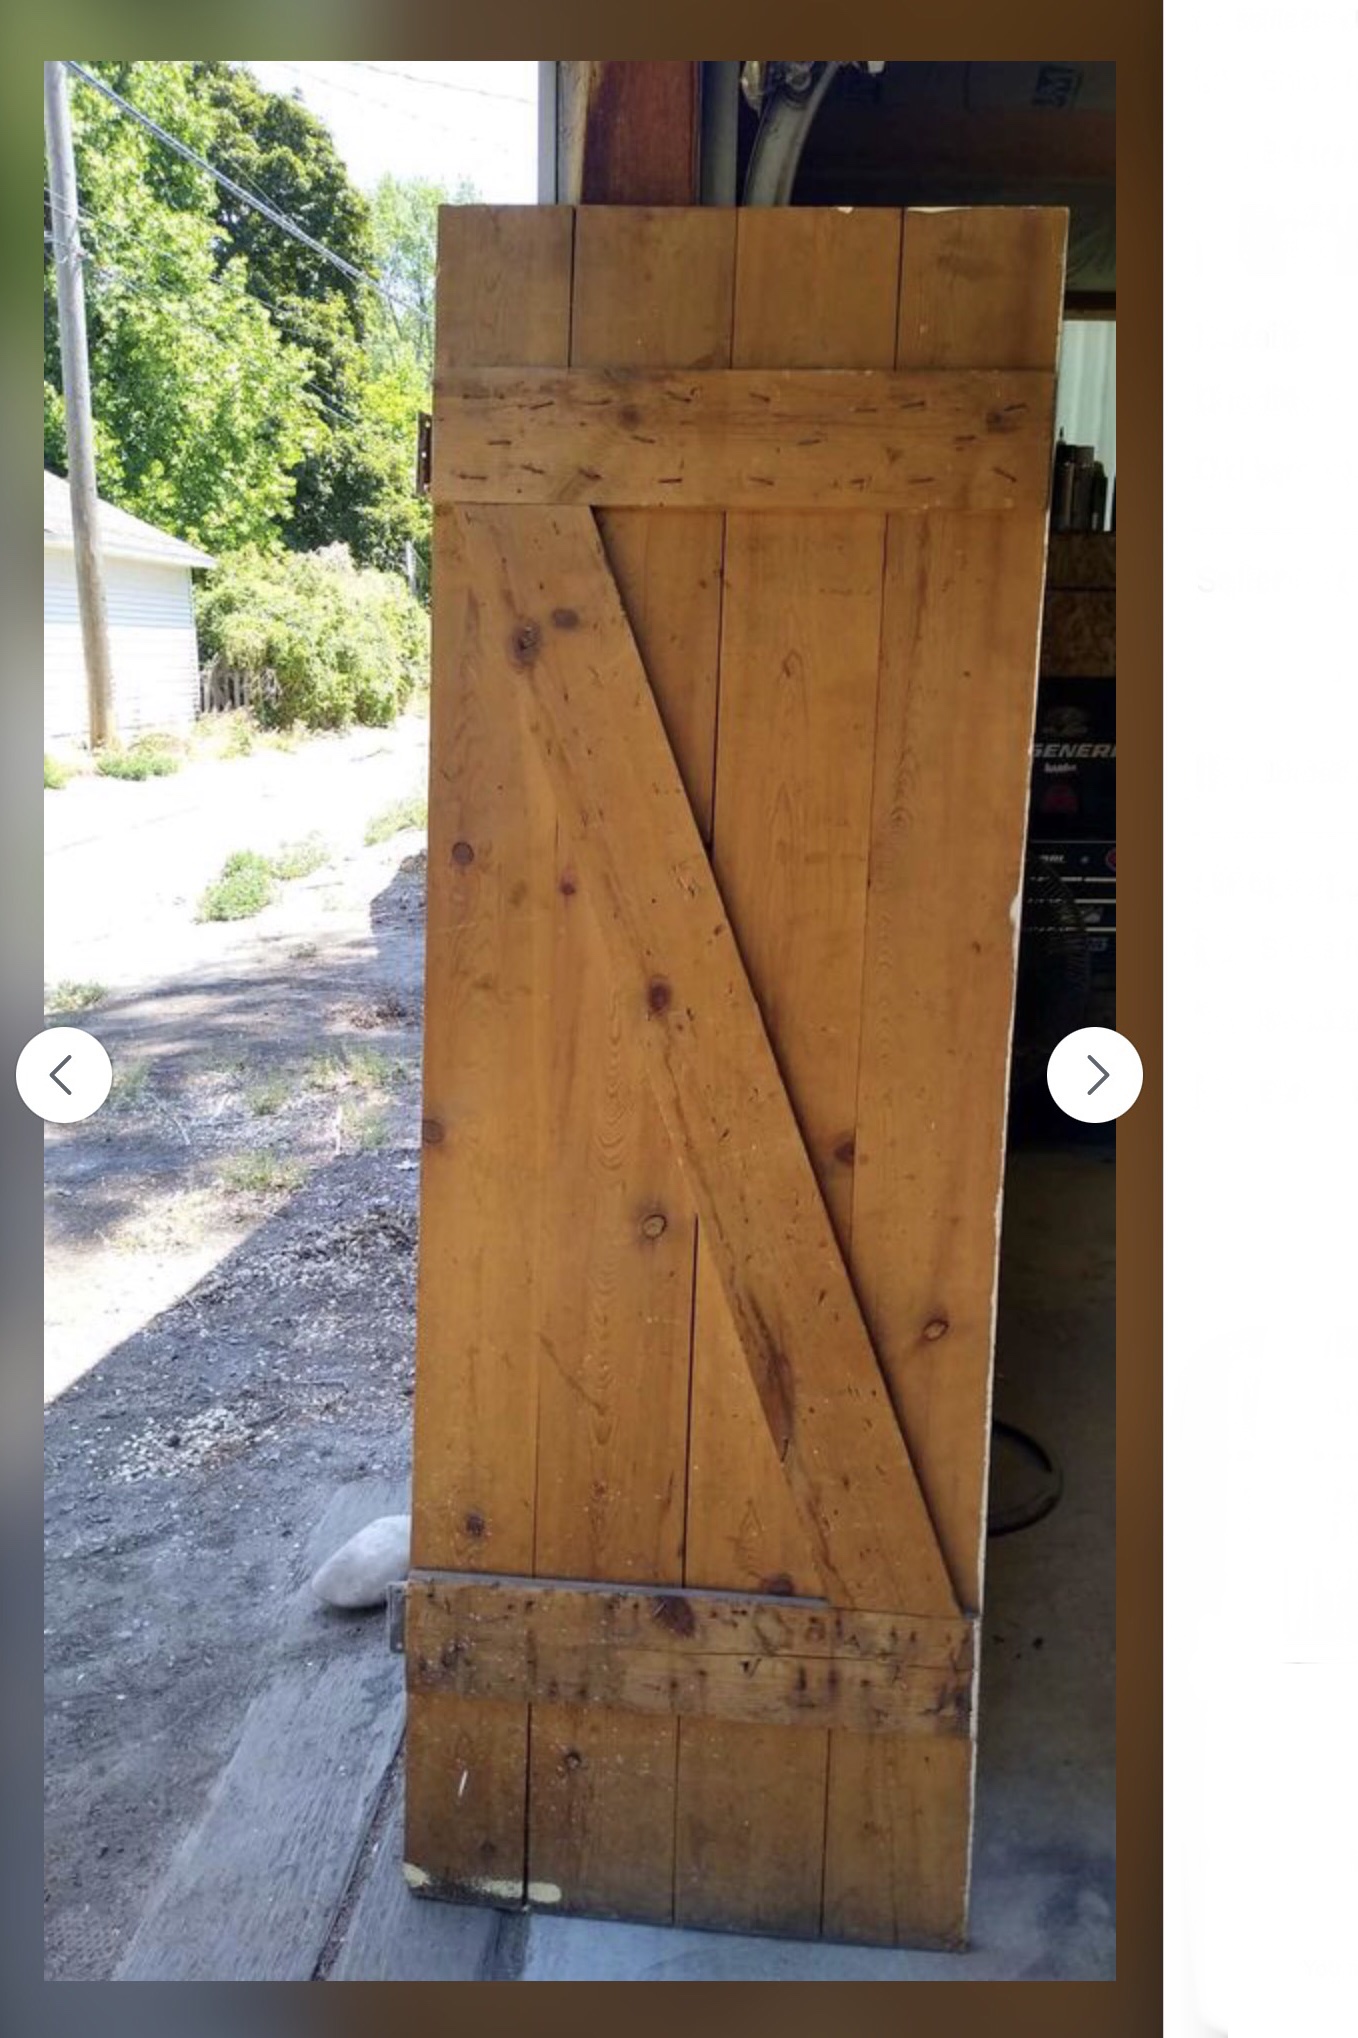
I also sourced an old barn door (that had to be cut down) from Idaho and some beautiful old barnwood that came from Montana. It all took some searching online and some driving. I feel these old time worn elements give the she shed character and a story, and the search was well worth it. Plus I loved using reclaimed materials for my studio.
Framing
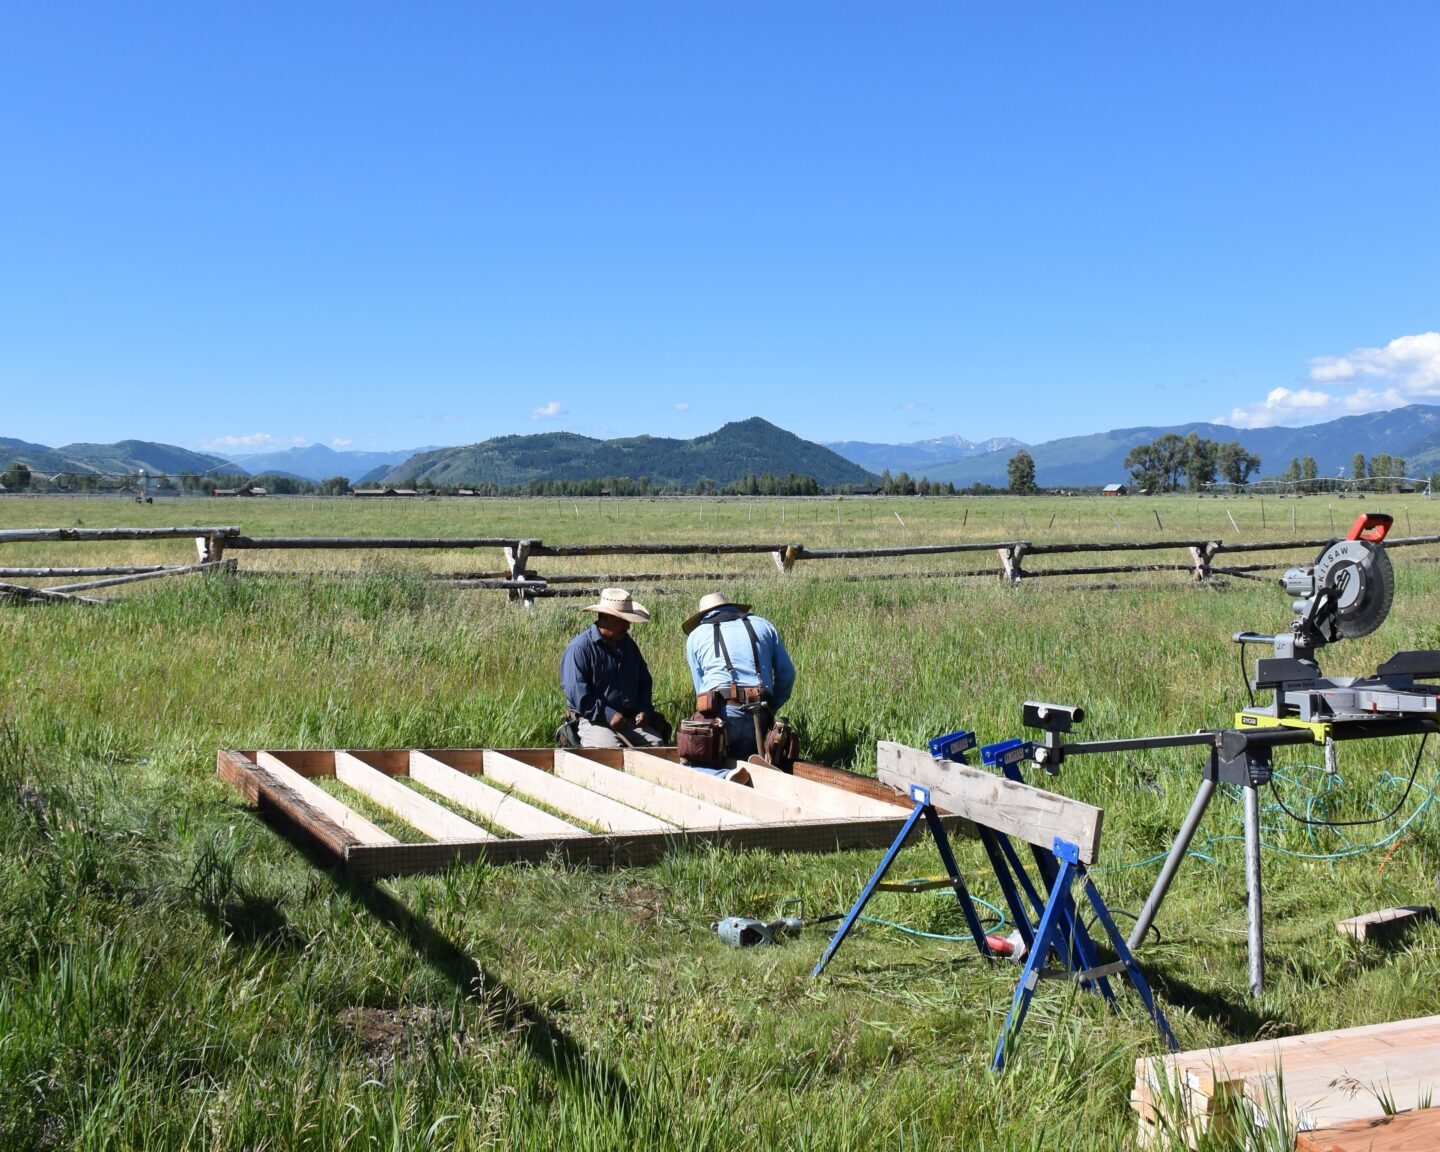
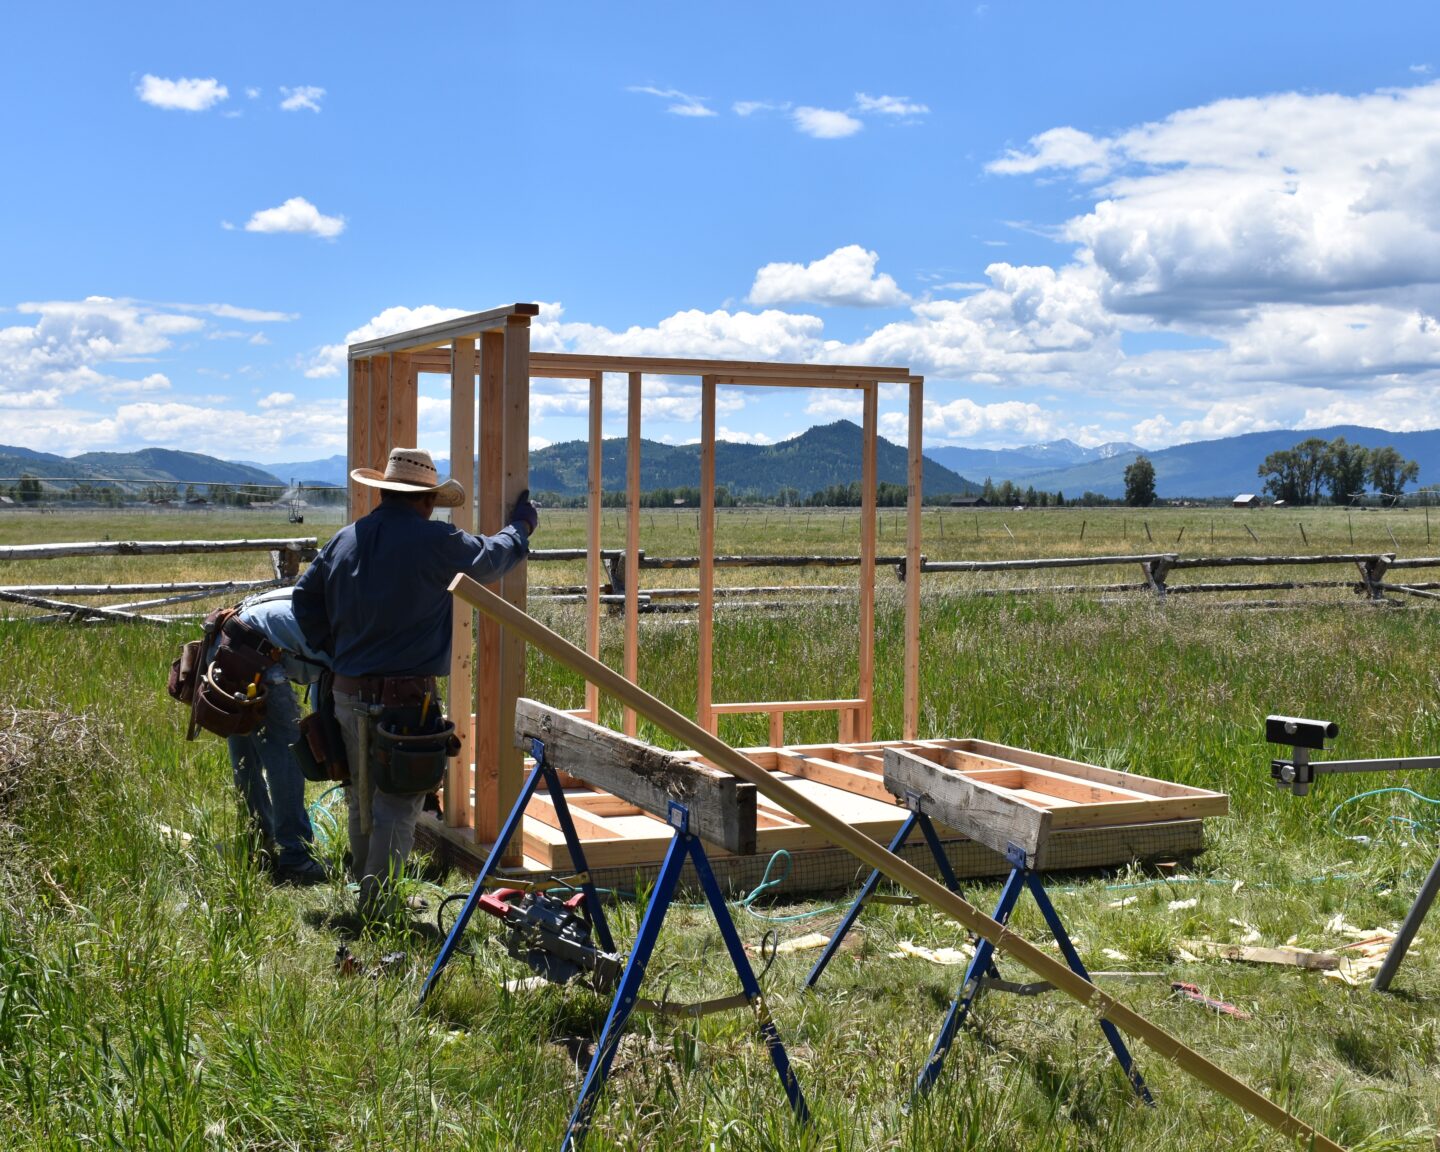
After I had all the materials, it was time for the work to begin! With sketch in hand I was able to hire two construction workers (their specialty is framing) to build my art studio on their off hours.
Watching the floor and the walls take shape was very exciting! The flooring system was built and put up on concrete blocks to keep it off the ground.
After the floor came the walls. The walls were built, with space for windows and the door, and then assembled. Within just a couple of days the skeleton of the structure was up. Because I hired professional framers to build the building, it was framed with lots and lots of 2″x4″s to code. This building is sturdy, which is important because we get some high winds here in the valley.
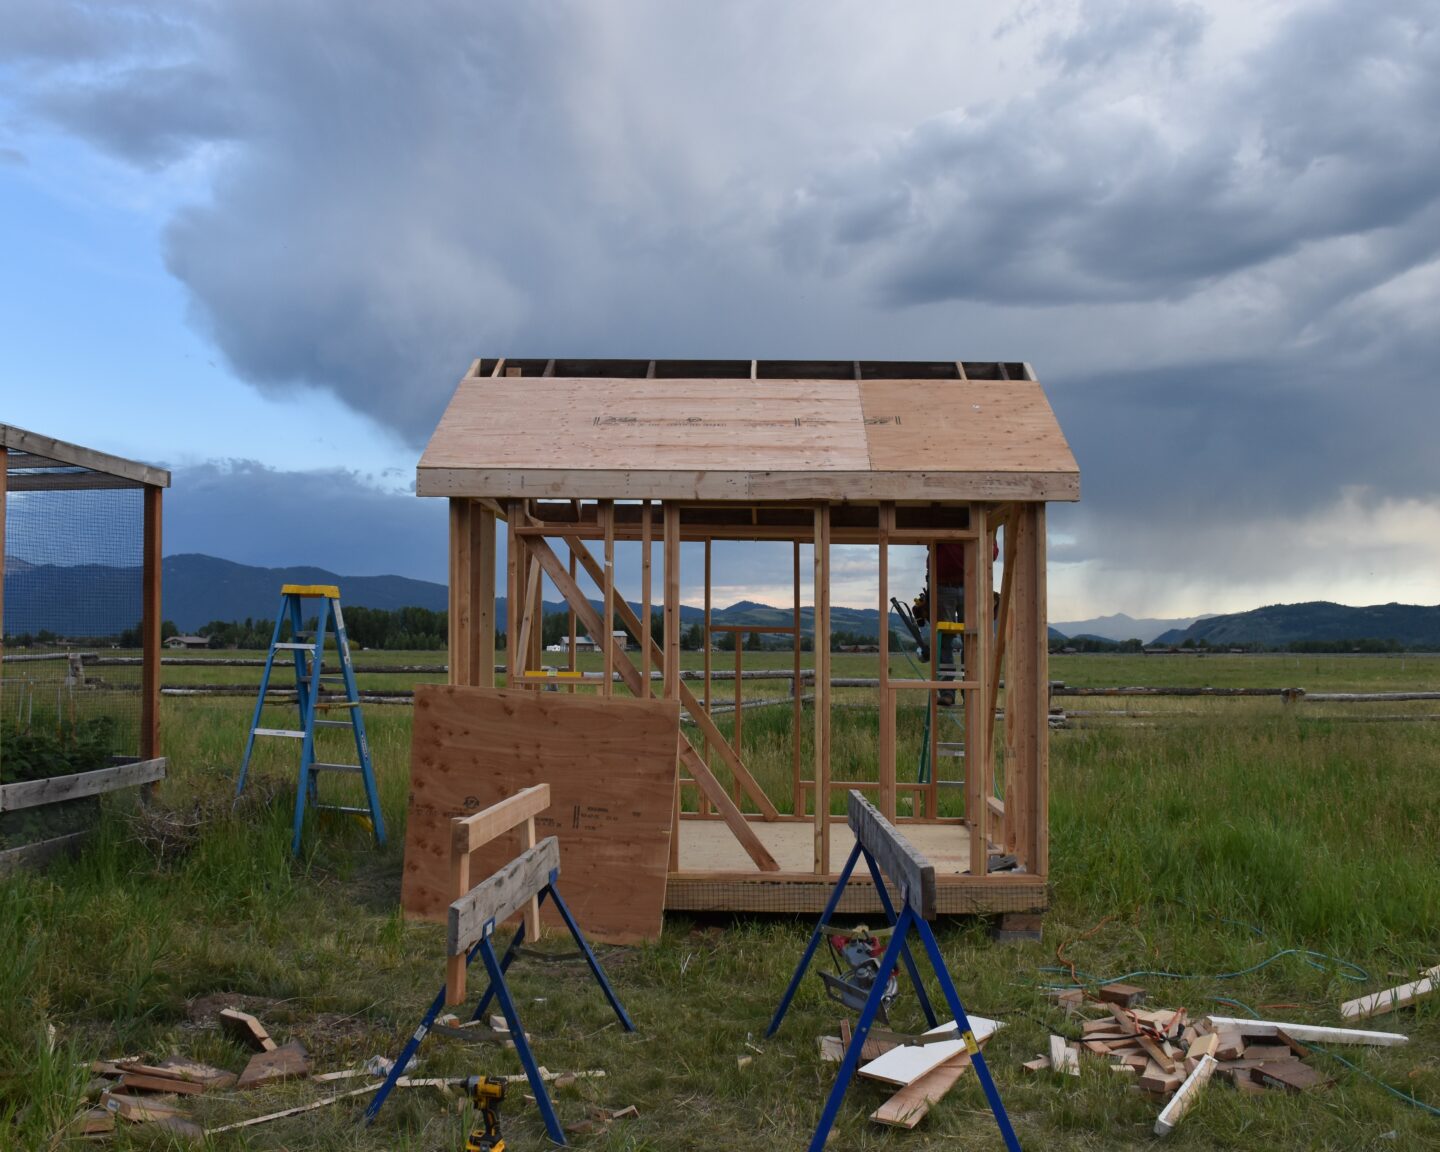
The Roof Structure
Next came the roof. First the 2″x6″ beams, which you can’t see here, then plywood, then tar paper and later a metal roof. I left the 2″x6″ beams exposed on the inside to give it that rustic feel. I also stained the beams before they were used, that was a lifesaver.
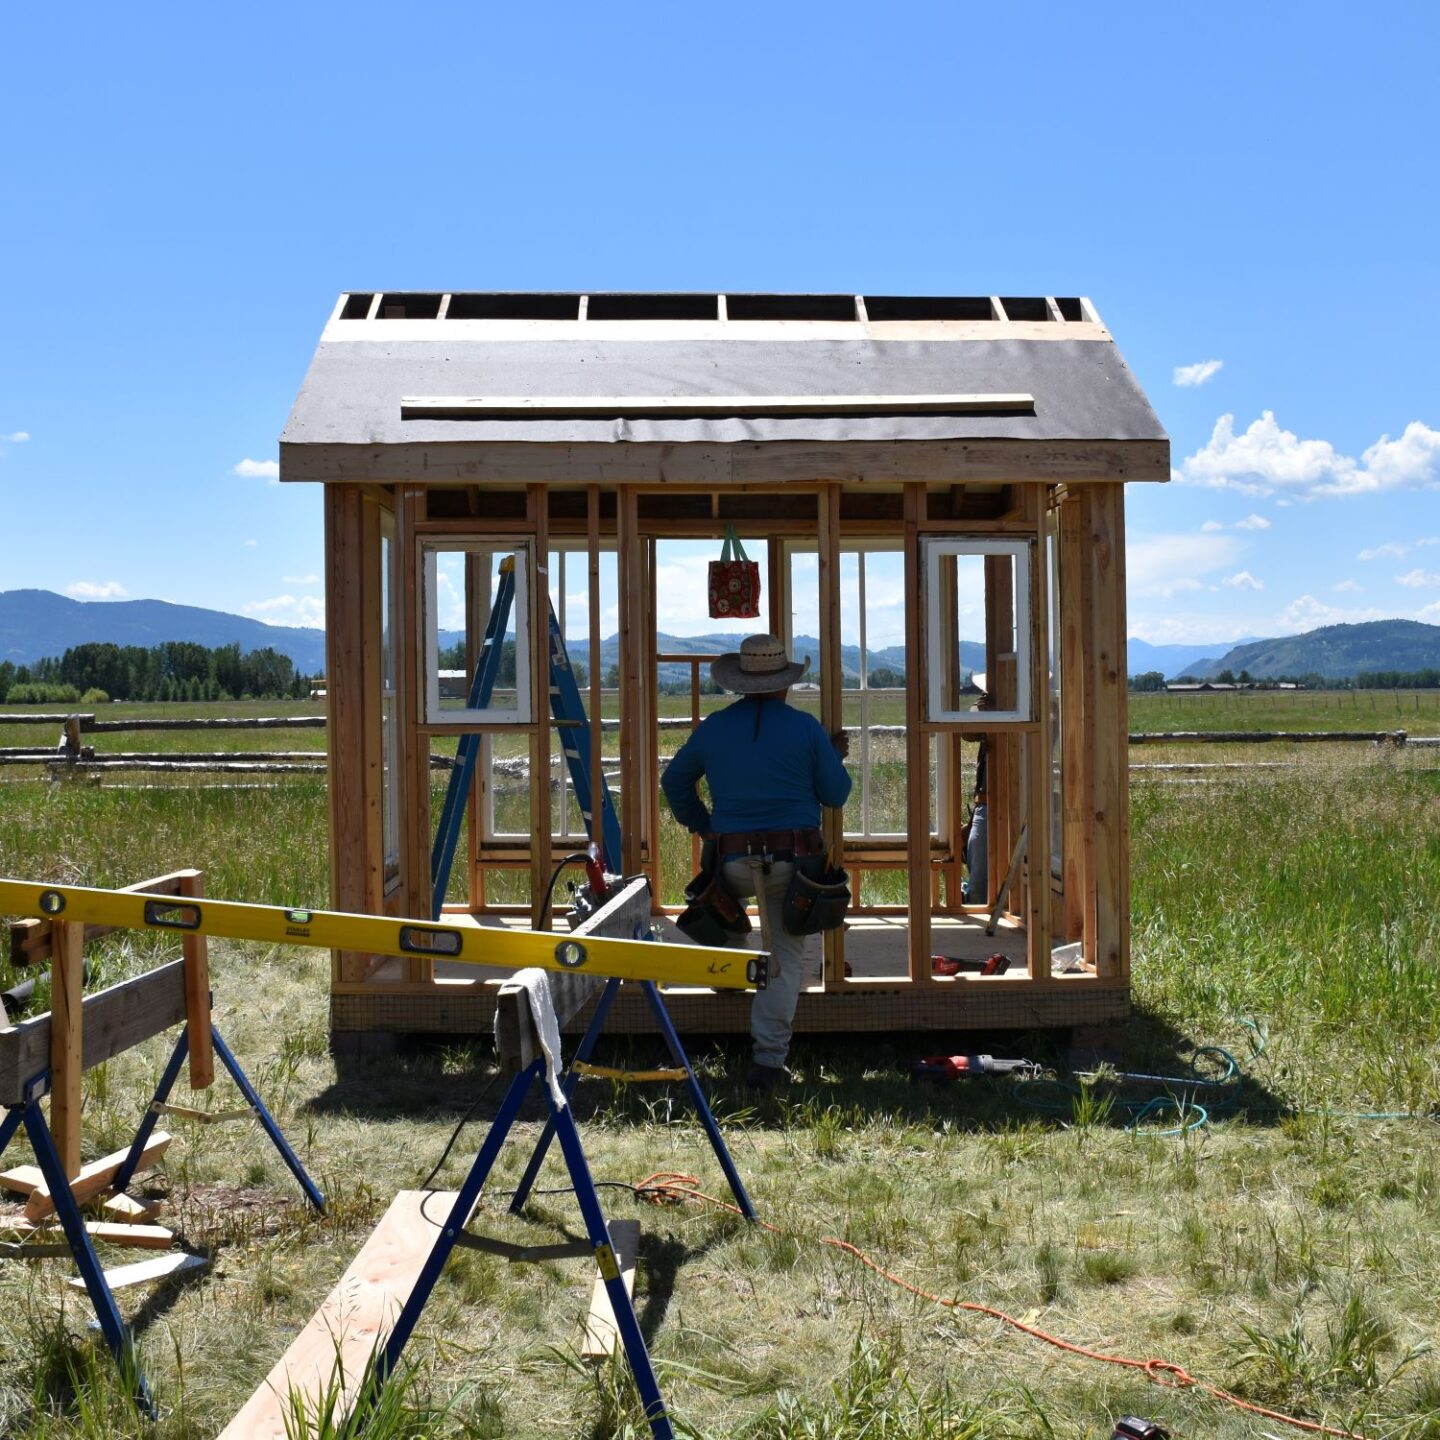
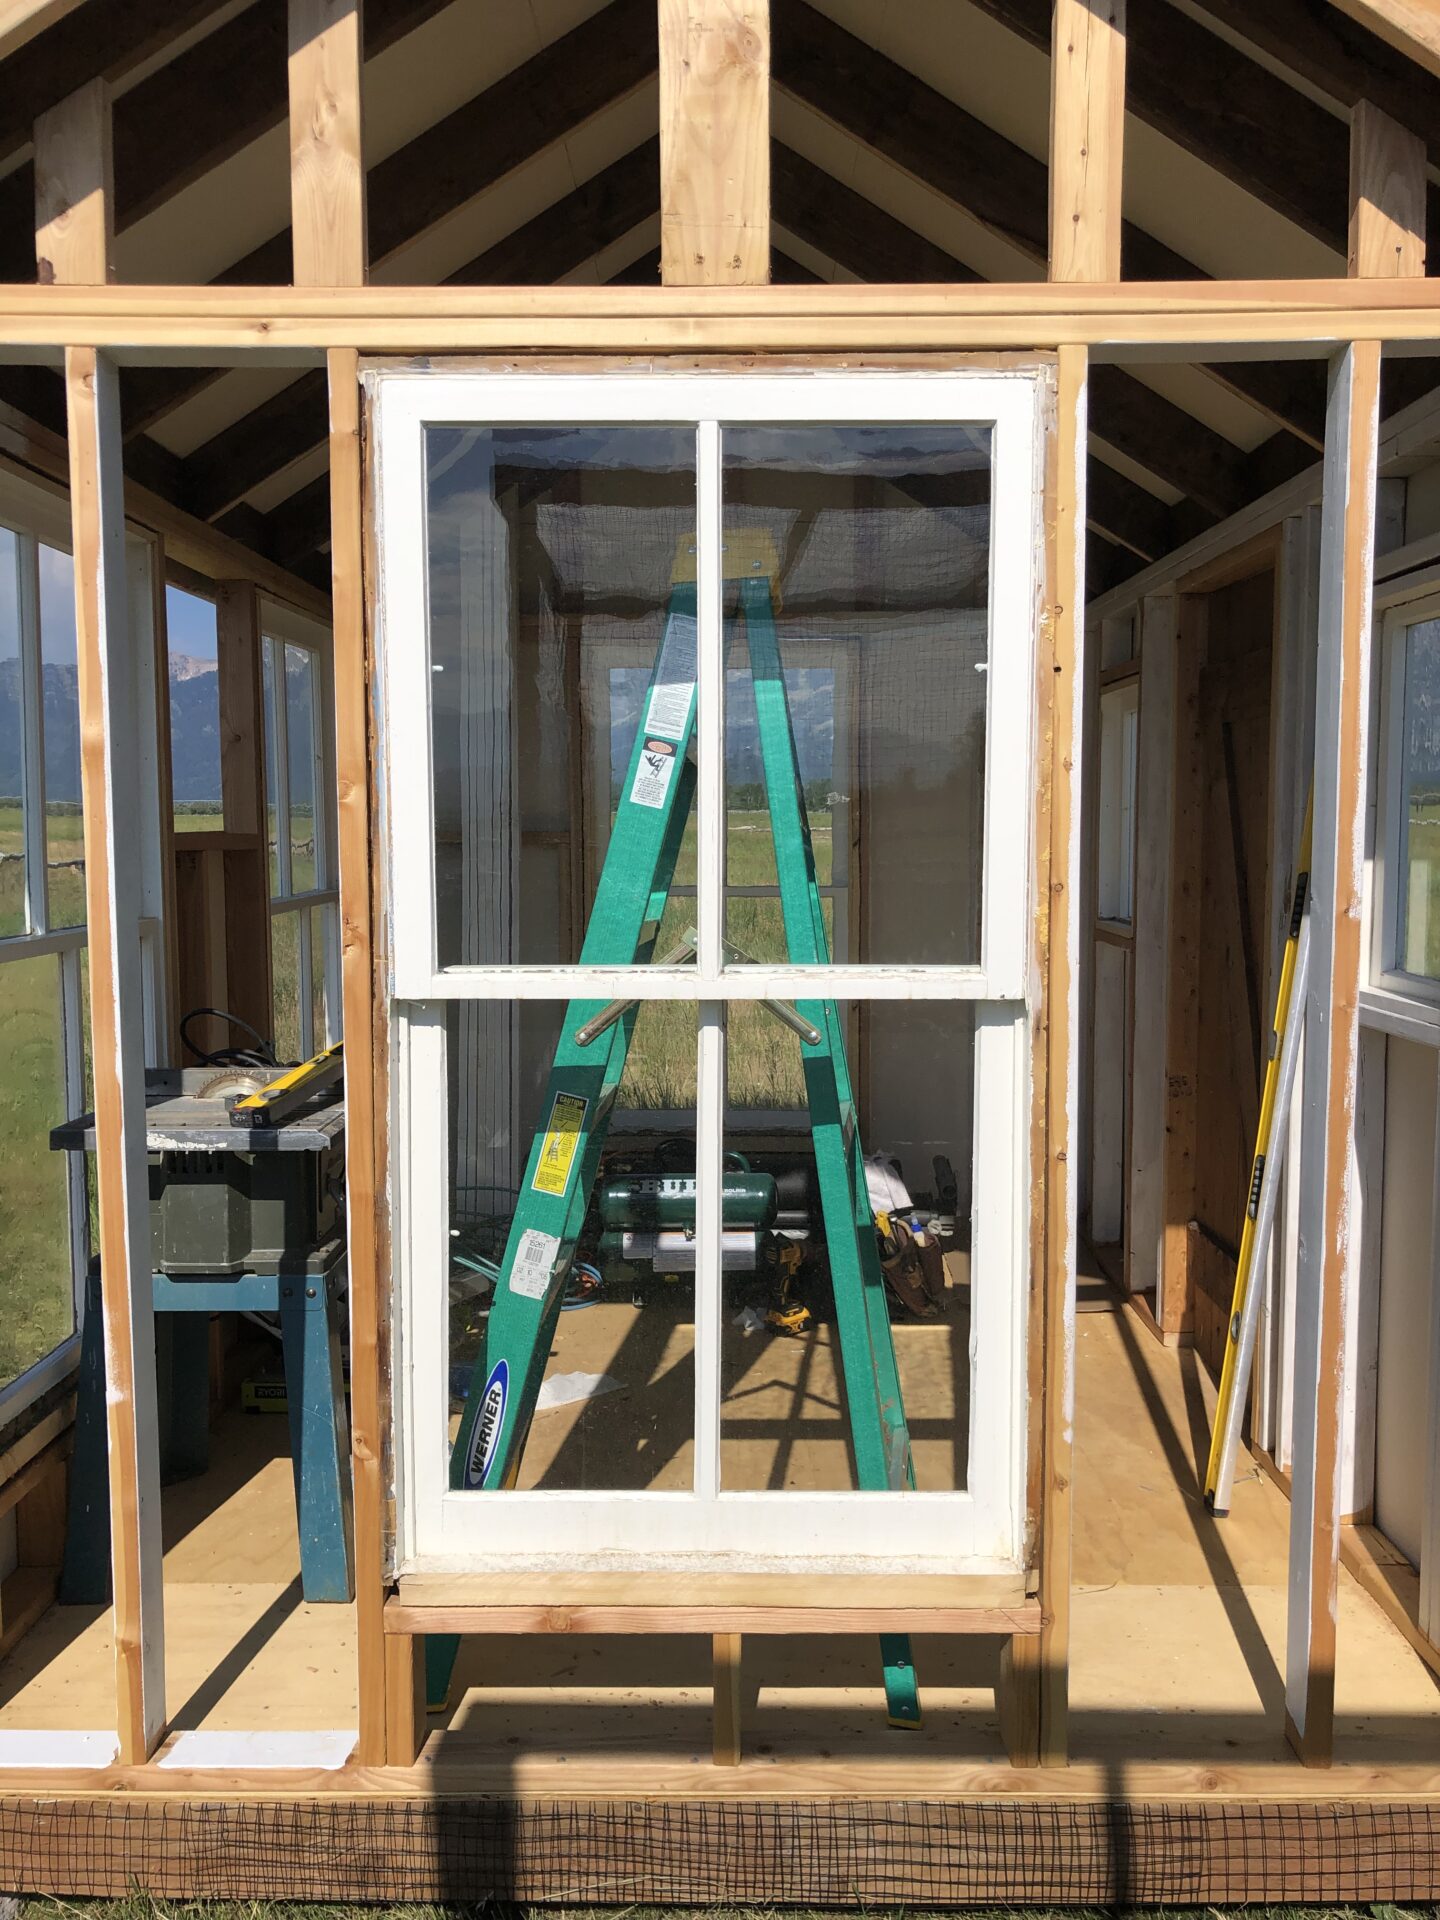
Windows Options when you build your Studio
Below you can see the windows are being placed into the spaces left for them in the walls. I should note that old windows are great but they take a little more work to install. These windows came from a house that had 10″ thick walls (I’m not kidding, you can see that in the photo above where I show you the windows before they’re installed) so it required cutting off some of that excess wood.
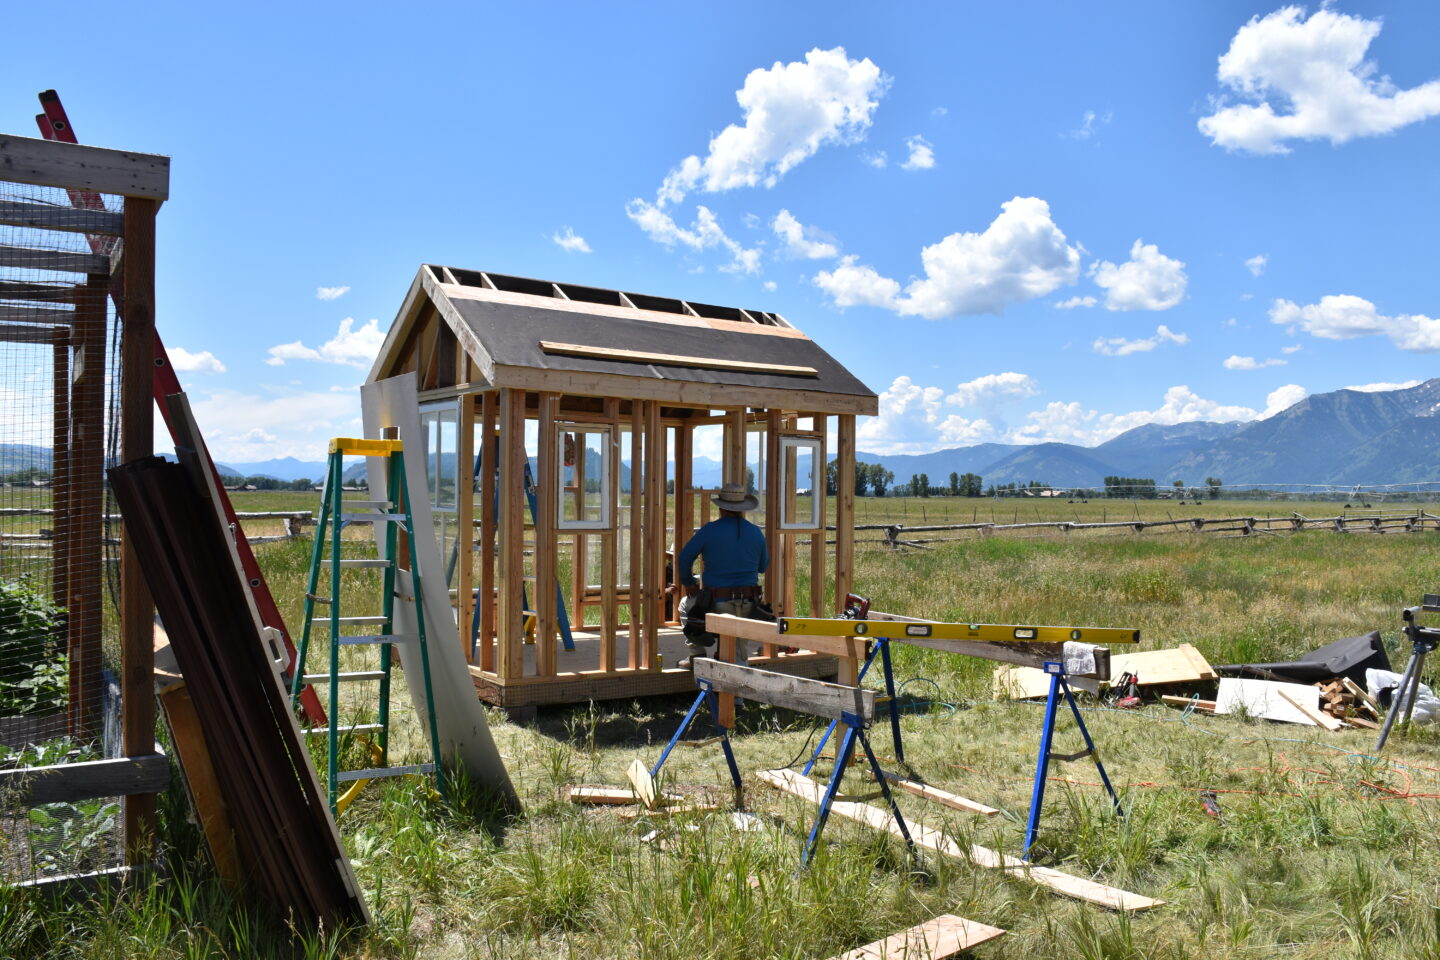
A Metal Roof
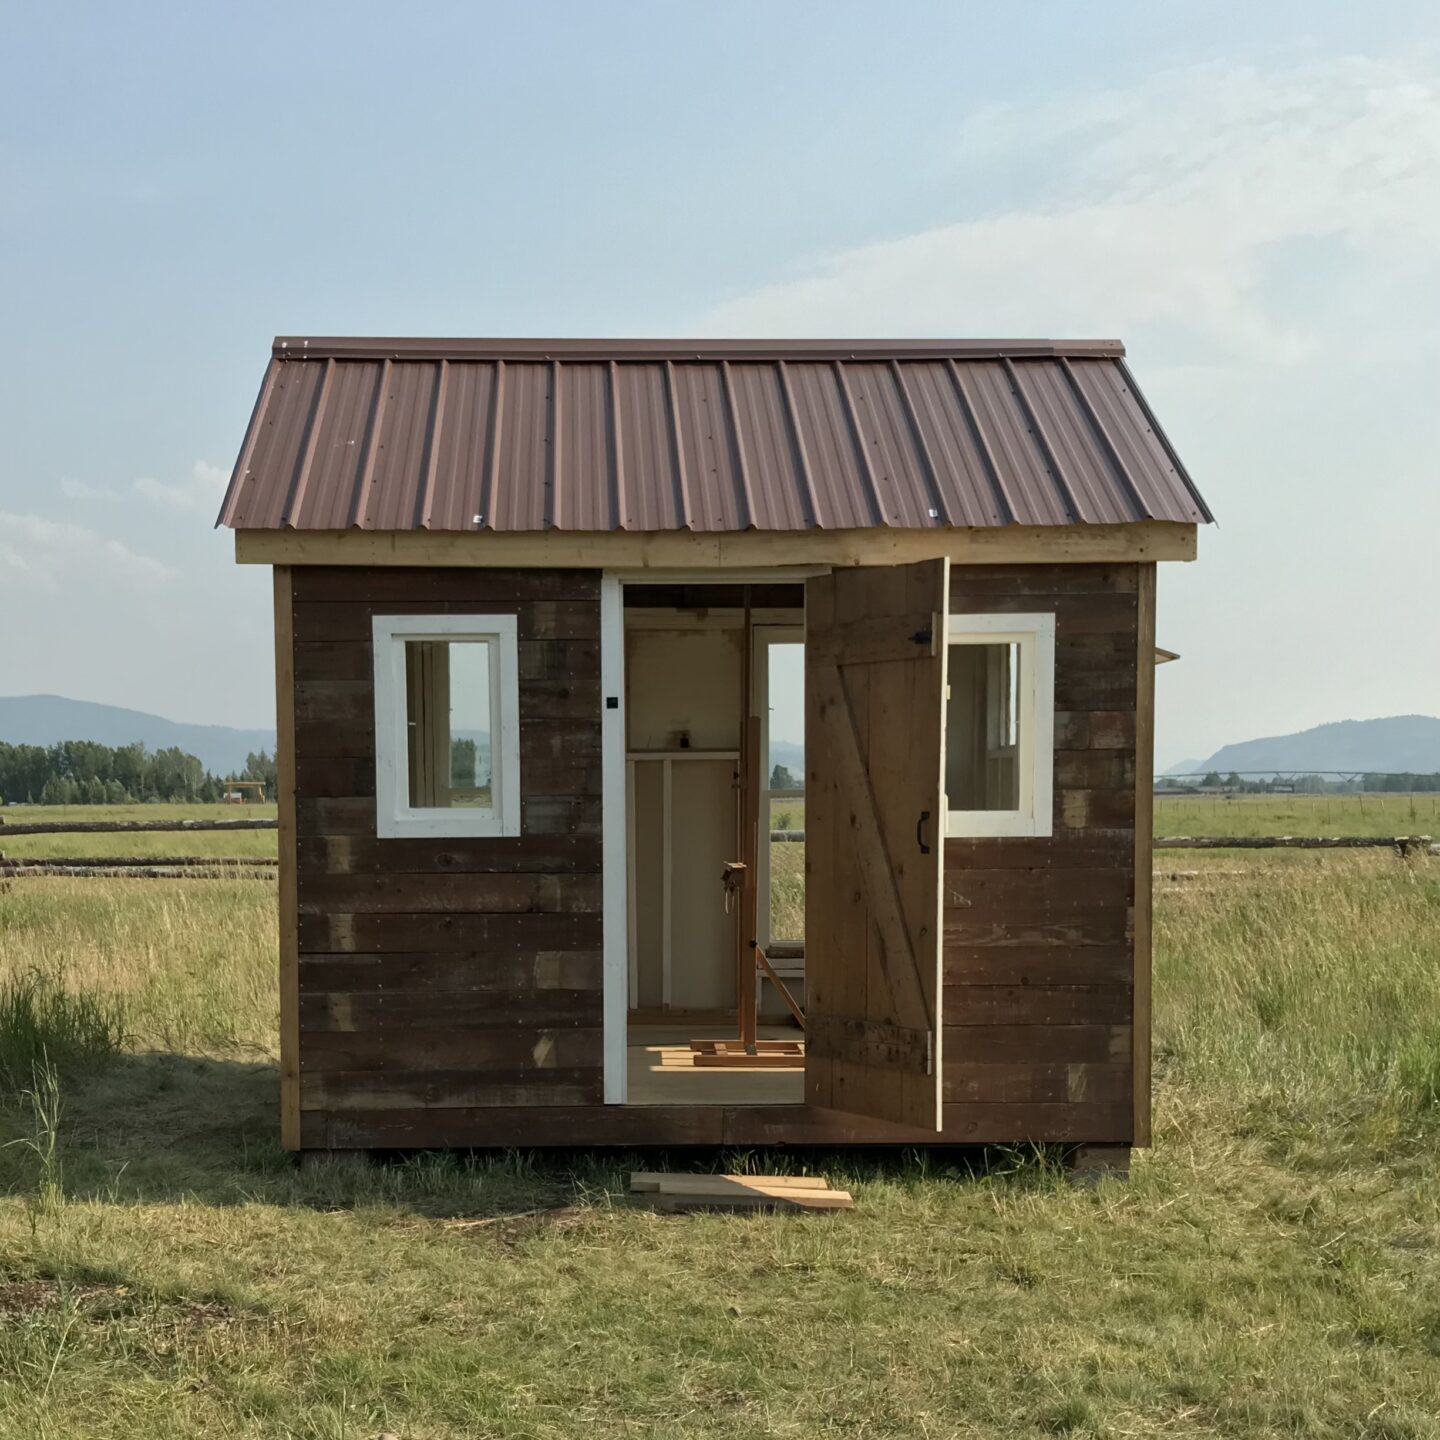
Below you can see the roof is on. It’s a metal roof because there is nothing like hearing rain on a metal roof. I’m looking forward to being in the art studio during a rain storm. I looked around for a reclaimed metal roof, but metal roofs are so thin it seemed after they are used they aren’t in great shape. They get deformed and bent easily. So we went with a new roof which was I’m sure easier to install than some old bent up roof. Though those old roofs do have a great look!
The perfect Door!
The door is also in! I found the perfect old barn door on FB Marketplace. This door seems to have made for this she shed, it’s just the right size.
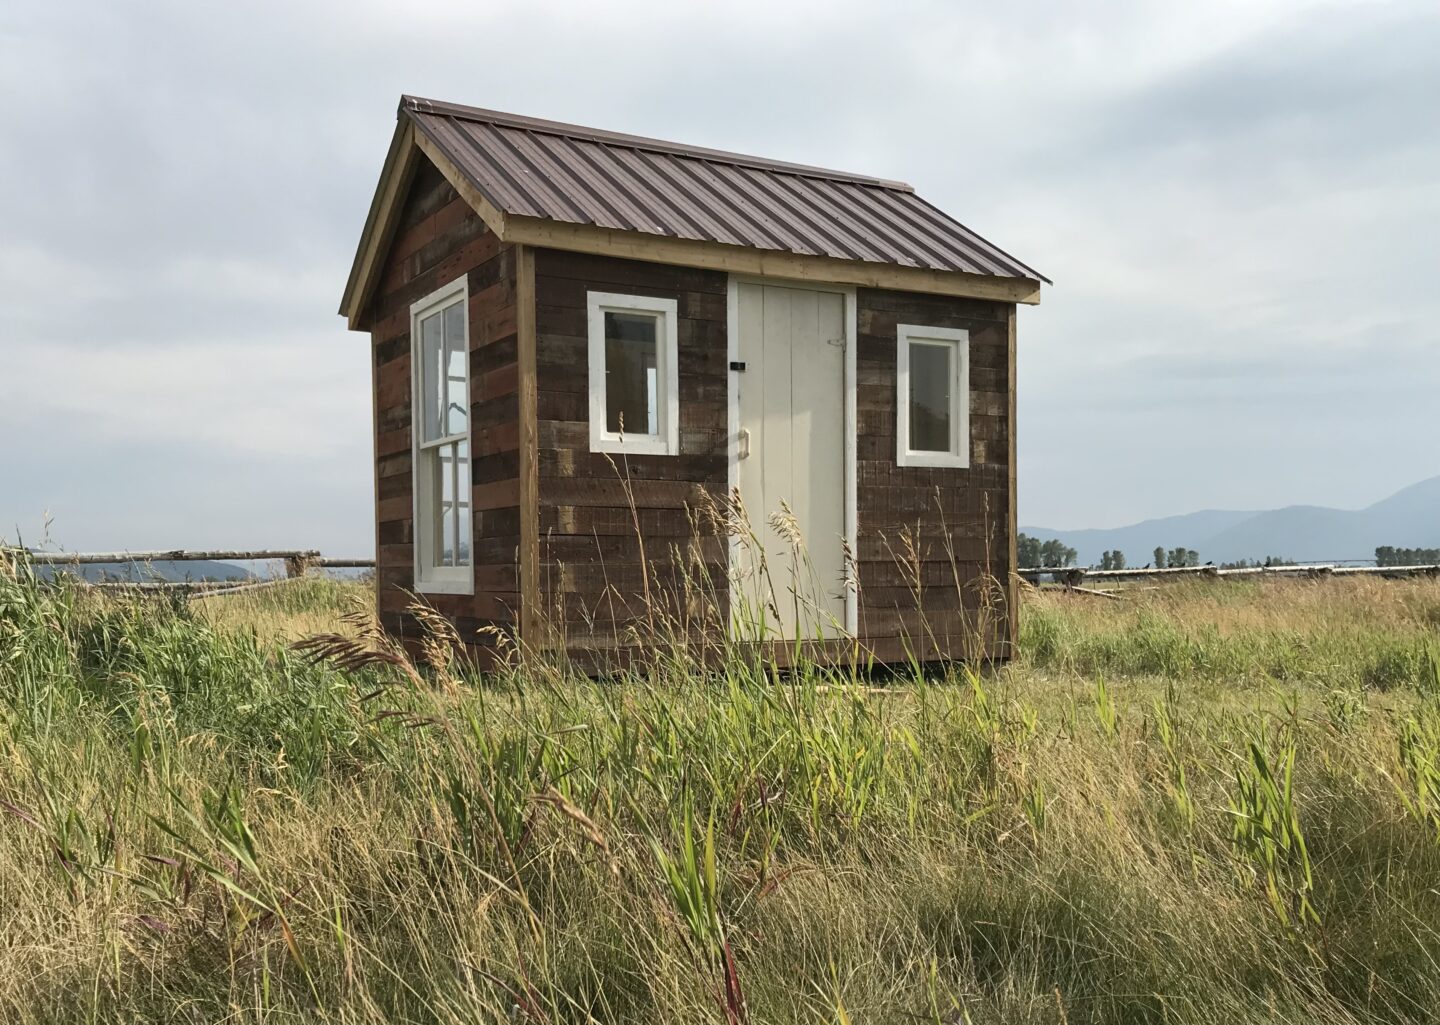
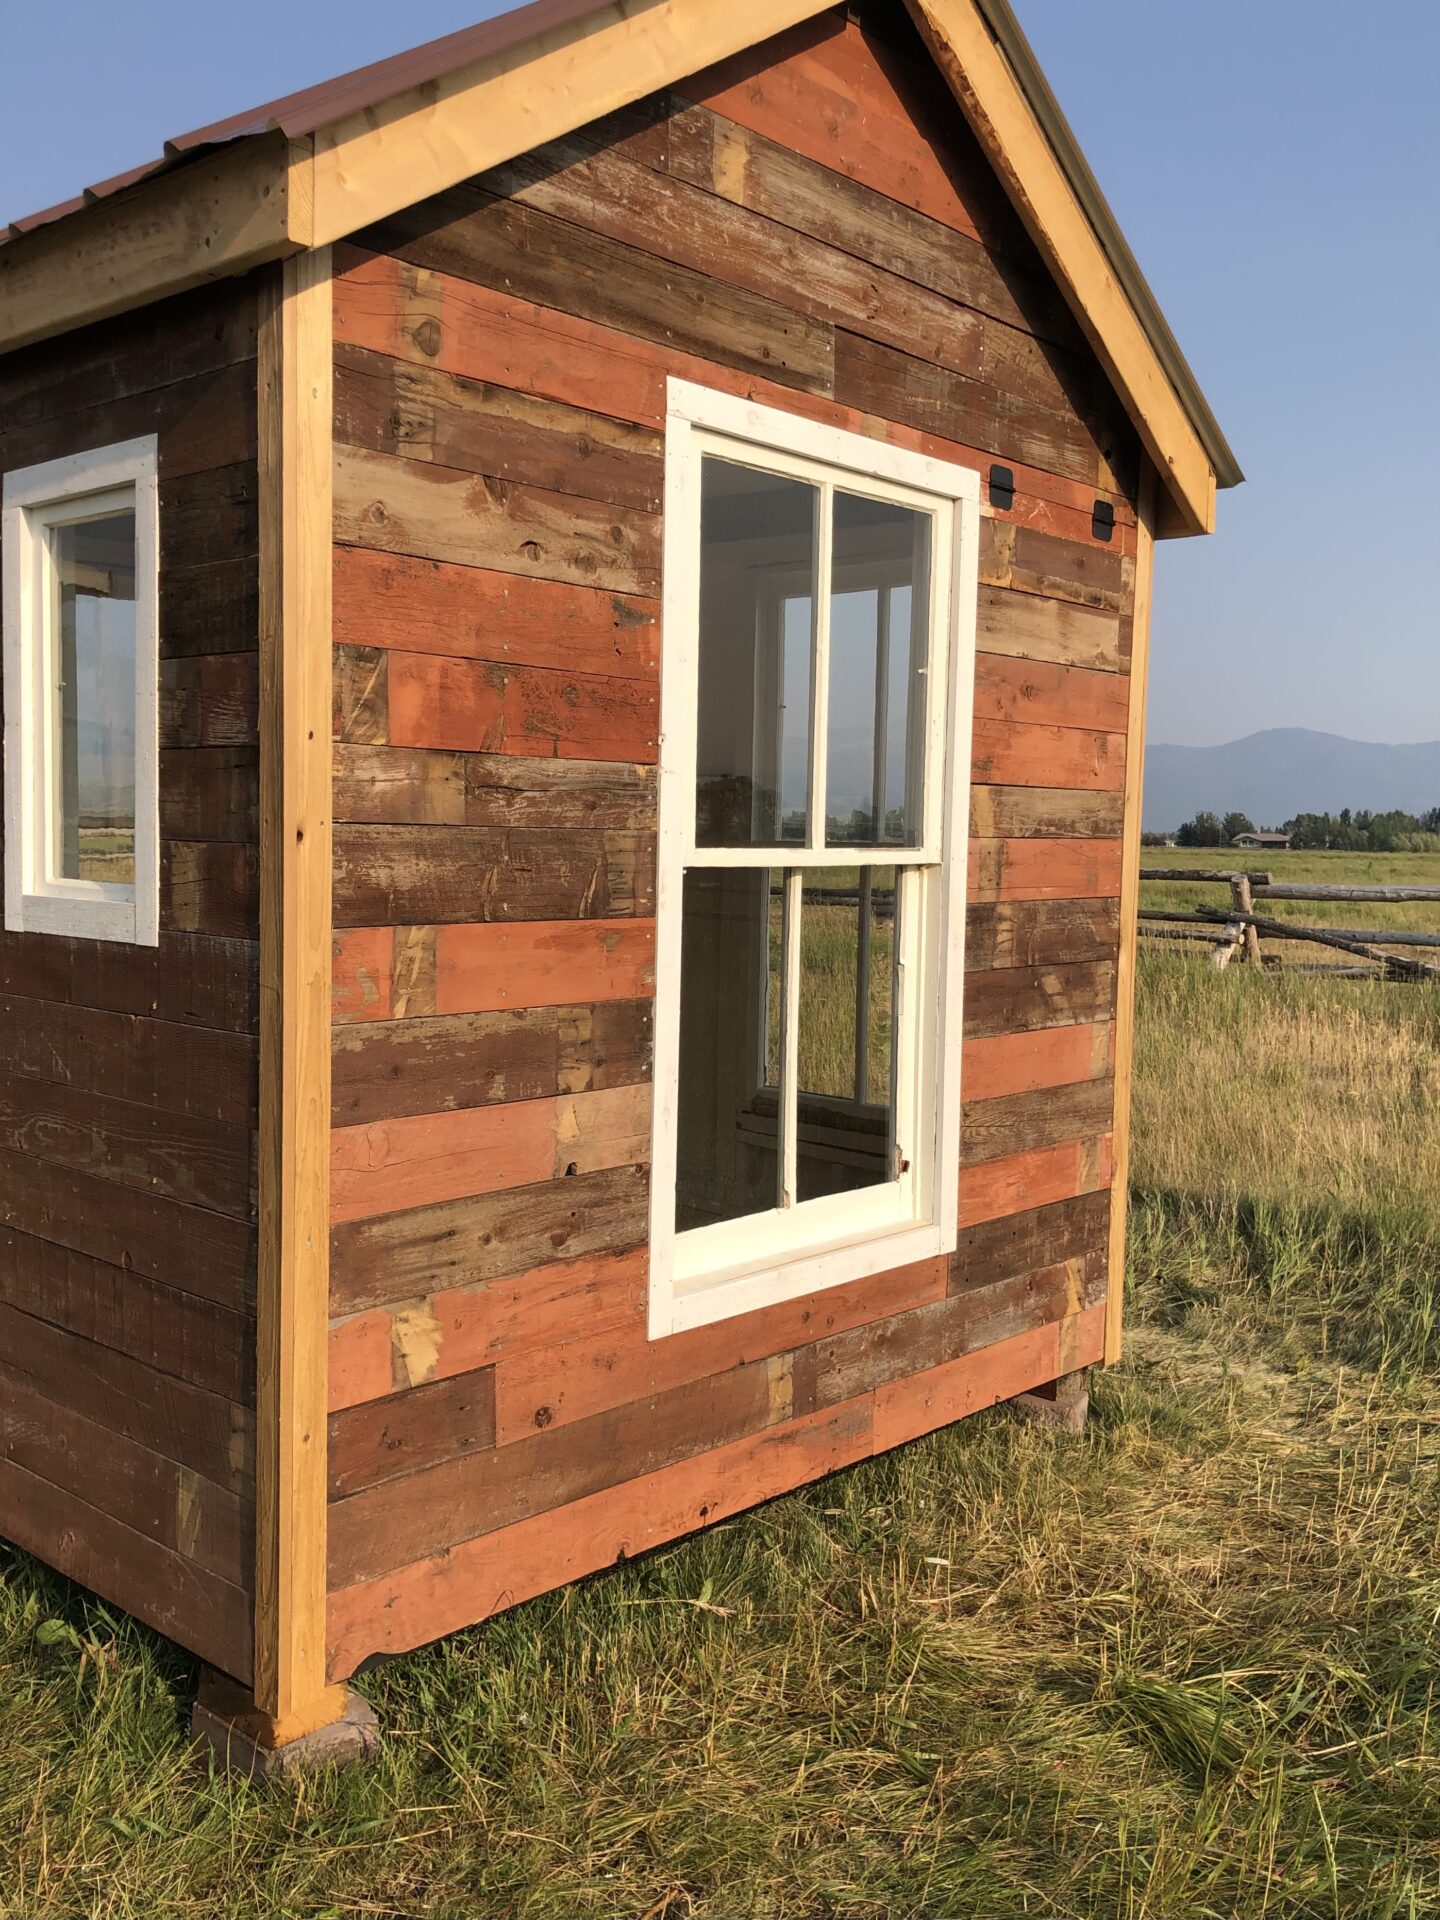
Siding – Important when you build your Studio!
I felt siding was very important because it defined much of the style of this studio. But, siding options are limited, especially because I wanted something old and authentic. I did find some wonderful old barn wood from Montana. Again, on FB Marketplace. But it was in the town of Thayne, Wyoming, almost 2 hours from our house.

My sweet husband drove with me for 2 hours to the ranch where the sellers lived, along with their stacks of Montana barn wood. I put on my gloves and picked out what I needed and we loaded it in the back of our SUV. This was a really fun day for me!
I love the way the siding worked out. It was well worth the drive to go and get it, at least I think it was!
My Happy Place
This studio was a big project, but well worth the trouble.