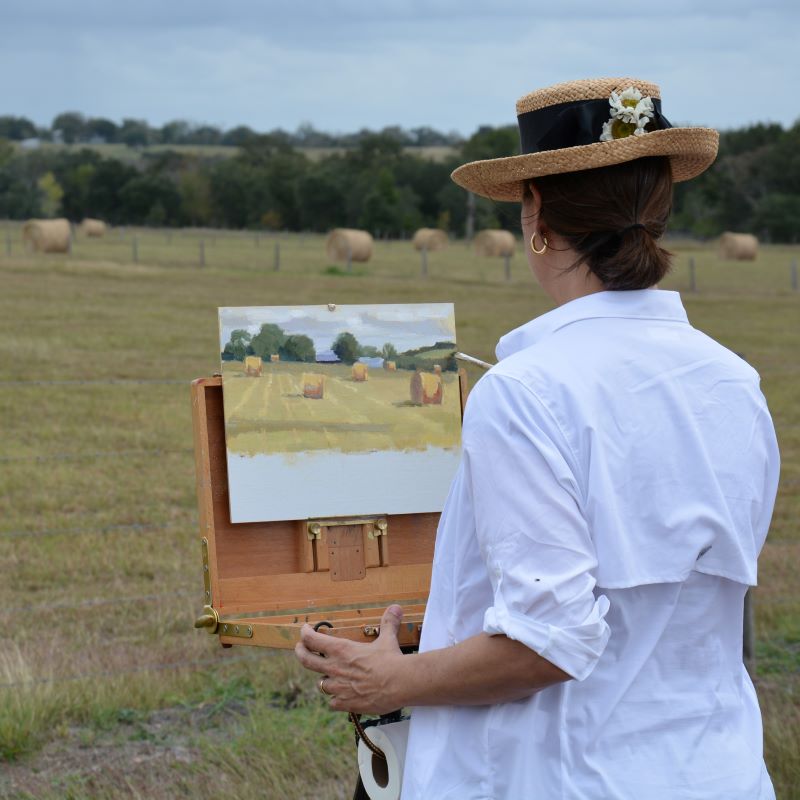
Recently I used a small plein air study to create a larger studio work. I pulled out a little plein air study from one of my painting adventures with Myrrh. I decided to paint a larger version and what I’ll show you is a 15″x30″ oil on canvas that I painted in my studio from the 7″ x 14″ study that I’m painting in the photo above.
Start with a plein air study
The point (for me) of going out painting plein air is to gather information and record it on canvas, not to create something that looks like a studio painting. Though I admit when I’m out there gathering information and putting it on my canvas, I’m trying to organize my painting into a nice composition and I do usually paint until the painting is fairly close to a “finished” stage. And I’ve framed and sold many of them.
But as I think about that now I probably should be paying less attention to making a “finished” painting and focus more on value and color when I’m out in the field. Then, if I want to, when I get back to my studio I can create a studio painting using the colors and values I’ve recorded plus a photograph I’ve taken.
Using a View Finder or ViewCatcher
I was very happy with the composition of this painting. I have a small ViewCatcher, an adjustable plastic square that I hold up to my eye and look through to choose what I’m going to paint, so I’m usually painting something that has a decent composition to start with. You can read more about this invaluable tool on another post.
In this case I wanted to paint a horizontal painting but didn’t have the correct sized panel. I grabbed an 11″x14″ and later cut off the lower 4″. The studio is the place to spend time on the composition. I recently finished a painting that ended up very different from my photograph reference, that happens often.
Reference material used to create a studio painting
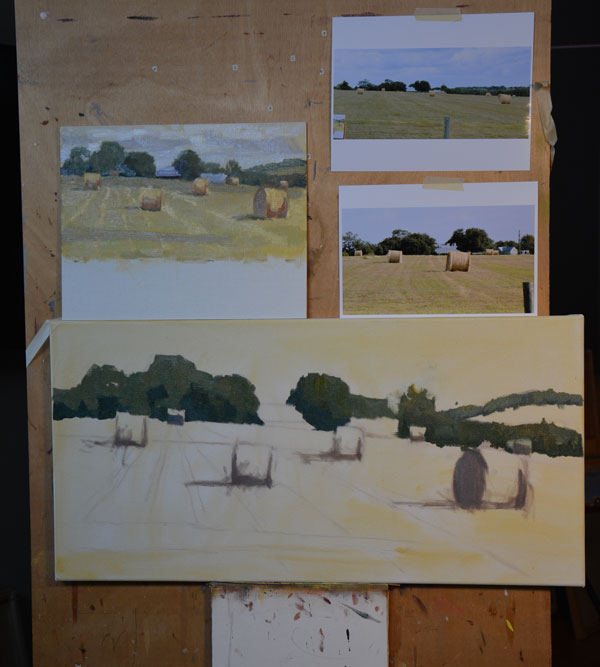
So, when I get ready to paint in my studio, I put up as much reference material as I can. In this case I taped two photographs to my easel, one taken in sun and one in shade. Why the one in shade? I usually take a photo when I get to a location then another one after I paint it and I’m finished. There is always a noticable difference because at a minimum the sun has moved over the 2 hours or so it takes to paint a small painting. And sometime clouds have moved in and conditions are very different. You never know what’ll be handy later. But in this case I think the photo with the shade was the only photo I had of the view over to the right.
Starting the painting
As you can see above, the first thing I did was do a loose sketch of the painting. I sketched it and painted it once before while on location so it was fairly simple just to draw the scene again by looking at my reference materials. Then I do what I always do, put in my darks. Everything that’s dark gets painted first, that way I put down nice dark paint without getting any of my light colors mixed into those darks.
I use this same painting technique whether I’m creating a studio painting or painting en plein air.
After my darks are in (trees and shadow side of haybales) only then do I start mixing paint for the rest of the painting, or the “lights”. If it’s not a “dark”, then it’s a “light”. There are no “mediums”, only darks and lights to begin with. These basic dark and light shapes make up the design of the painting. Very important.
I’m not paying that much attention to detail here, I’m just trying to cover the canvas. You can’t really judge a color or value correctly unless you have something next to it to compare it to. I do have an ochre wash on my canvas but it’s still very light. So when I put down a green for the field, sure, next to the almost WHITE canvas showing, the green will look dark. So, I have to have ALL THE WHITE CANVAS covered with paint before I know if everything is the correct color and value.
There is no point spending too much time on details until you’ve figured out if the values are correct. No point spending 10 minutes painting the perfect haybale only to realize it’s all too dark or too light later when the grass goes in. This is especially important outdoors because those 10 minutes are precious. The light is changing. Fast.
Fine tuning your studio work
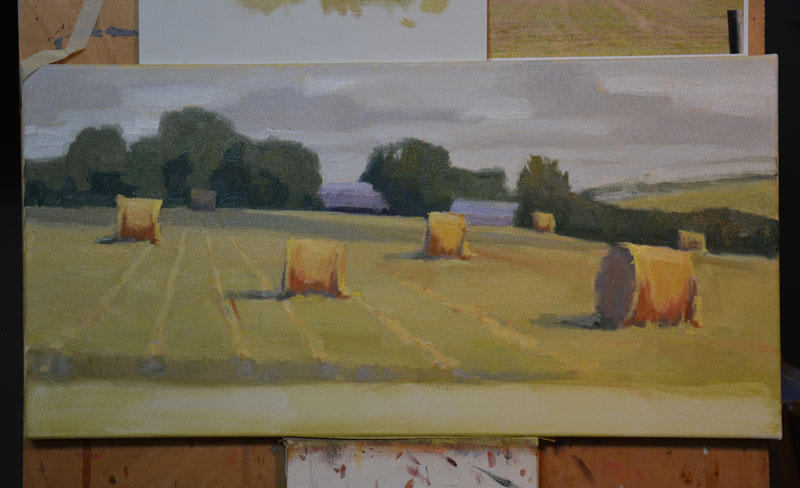
Once the entire canvas is covered, I start paying attention to details. I put in some reflected light in the shadows of the haybales and the shadow. Here is where I decided to make a couple of minor changes. At this point I’m trying to create a studio painting that stands on it’s own and is not necessarily an exact replica of the study.
Making a couple of changes to the studio painting
In this larger painting, the hill in the distance was too large, so I wiped off an inch of that hill. At the same time I lightened those distant trees. I wanted that hill to be less prominent, I wanted it to recede further into the background.
The other change I made was bigger. I decided that long narrow shadow at the front of the painting didn’t make sense. It’s supposed to be a cloud shadow, but it must be one long skinny cloud to have a shadow like that so close to the viewer. I needed to either remove the shadow alltogether or make it bigger. I felt the painting needed the shadow because look at that sky, shadows make sense with that sky. And secondly I thought making the lower quarter of the painting one giant cloud shadow was the bold choice, and why not be bold. In painting anyway it’s easy to be bold.
Finished!
After finishing the painting I always have to remember to sign it! Then it dries for a week, gets a coat of satin varnish and it’s off to the framer.
I hope this has encouraged you to try taking a plein air study and turning it into a larger finished work inside. Thanks for reading!


Great tweaks during your process, and love the feel of the final landscape
Thank you for commenting Ellen!
Love, love, love reading your process Joan! Great post!