Would you like improve your drawings? Or start drawing? Make drawing a habit?
Whether you sketch now and then or you’ve never drawn before and are a complete beginner, these 3 steps will help you get to where you’re making more and better drawings. And hopefully you’ll be a more confident sketcher because that lack of confidence is exactly what held me back.
DRAWING OR SKETCHING?
Drawing and sketching are basically the same, both are the act of making marks, usually with graphite or charcoal, on a surface. The word “drawing” is usually reserved for a more finished piece while “sketching” often refers to a quicker expression put down on paper. Here I use them interchangably.
Drawing is the important foundation for many types of art including painting and sculpting. It’s also a wonderful way of expressing yourself through pencil and paper.
It is SO IMPORTANT to draw often. The more you draw, the better your drawings will be. And the better your drawing are, the more confident you’ll become and the more you’ll want to draw. And with all that drawing you’ll improve your skills. But you have to take that first step and start.

Artists throughout history have made sketching and drawing an important part of their work and have devoted countless hours to mastering the skill. (Remeber that part about devoting countless hours when you feel discouraged.)
1. get the TOOLS you need
You need to have the proper tools and you need to have them handy. Drawing doesn’t require fancy materials and you really only need a few simple and inexpensive tools.
Sketch Book
You need a sketch book that is convenient to work with and has paper you like. By “convenient to work with” I mean it’s easy to draw on. Some sketching books don’t open flat, or they are so thick they are awkward to use. I’ve been using my favorite sketchbook for almost 15 years.
Pencils
You can draw with just one pencil. Often times I see a long list of pencils needed but they’re just not necessary. Graphite pencils come in a variety of “hardness” and “softness”, from 6B (very soft) to 6H (very hard). Remember those pencils we all used in grade school? They were 2Bs, right there in the middle. Not too hard, not too soft.
Really any mark making took will work, graphite pencils are perfect for sketching. You could start with a 2B and then eventually purchase a set to experiment. These are the graphite artists’ pencils I’ve used for years. The H pencils are generally used for sharper lines and details because they are hard. The softer B pencils are used for thicker lines and shading and even smudging to get shading. It’s all personal preference.
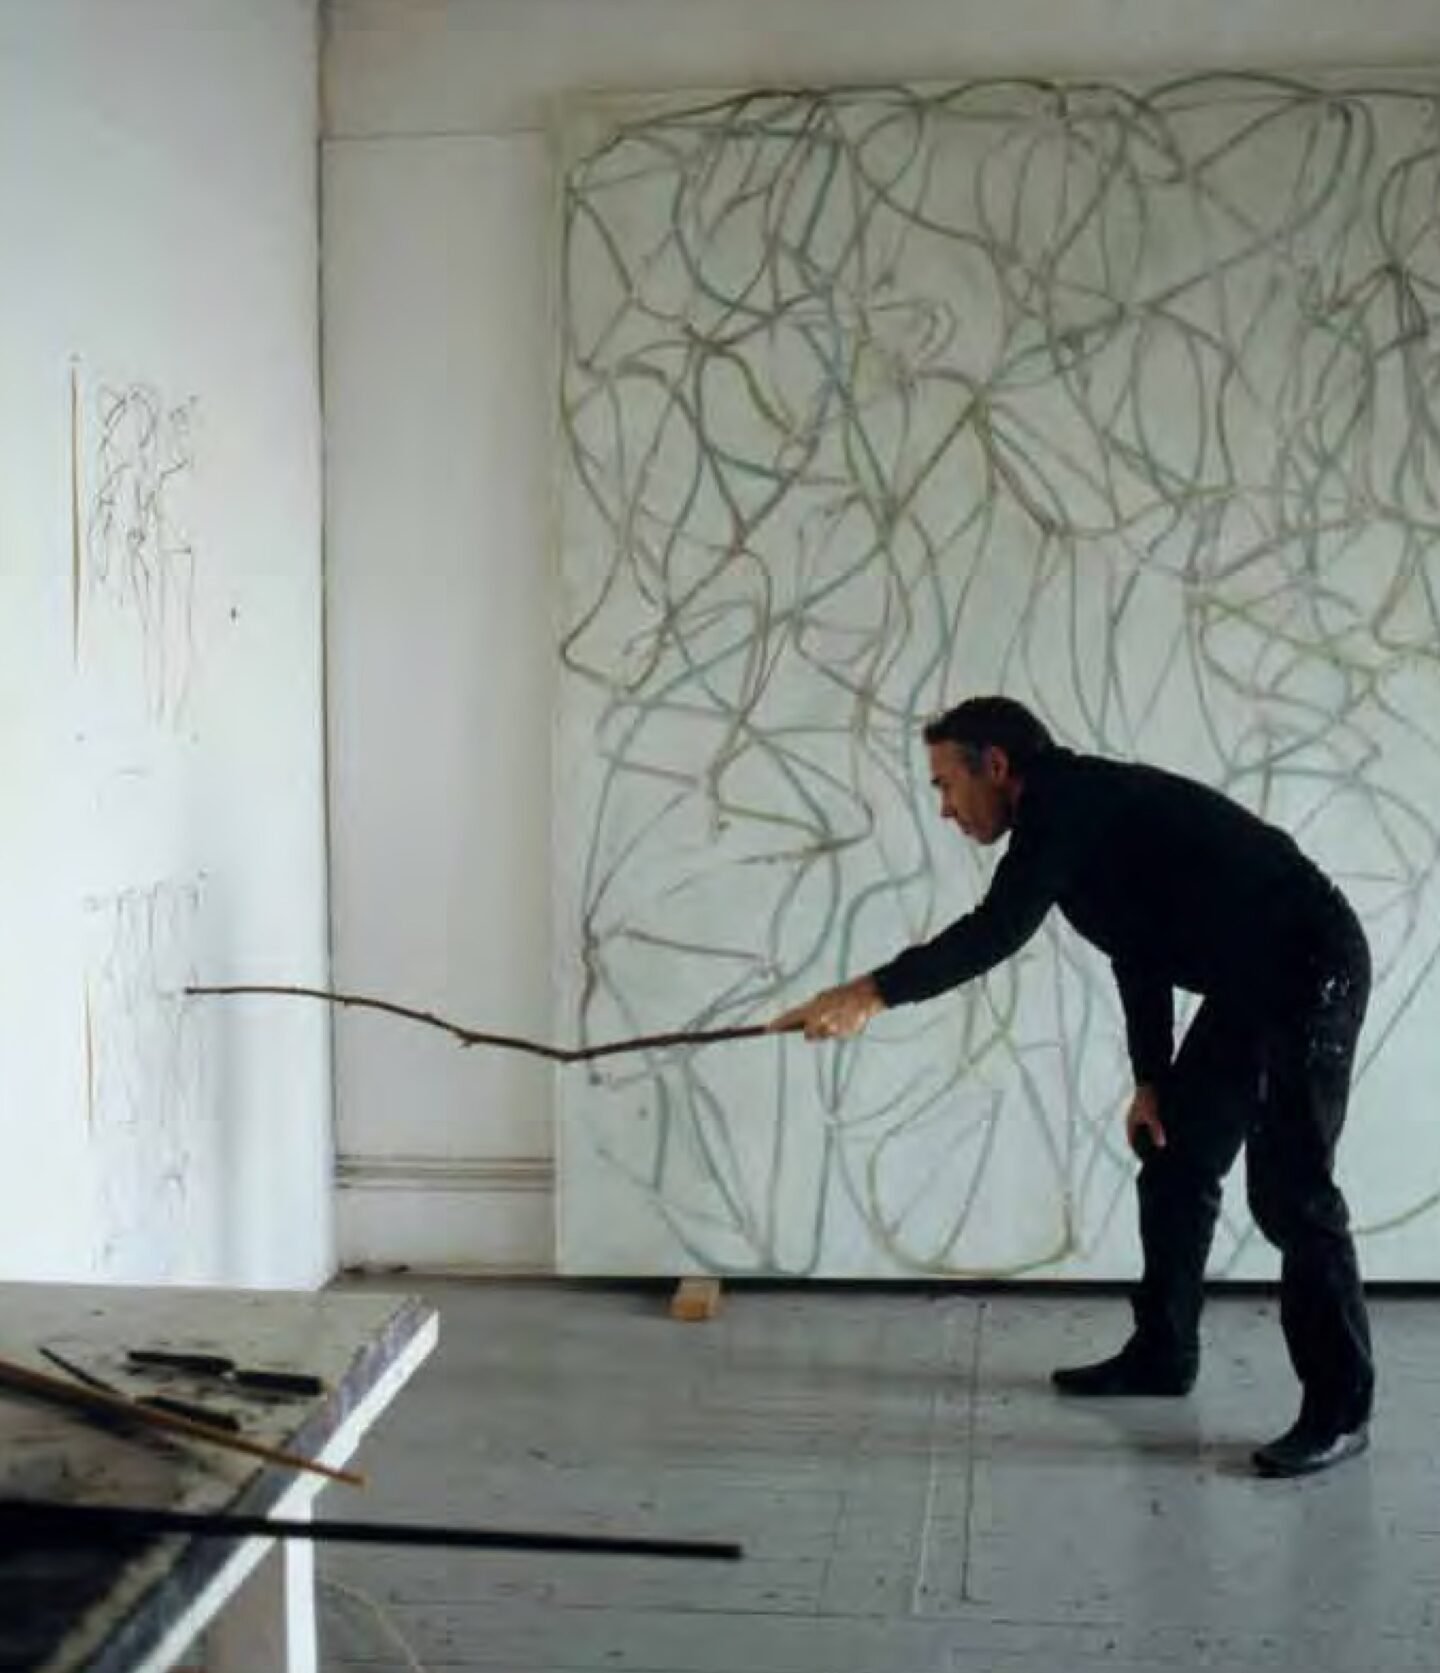
The artist Brice Marden uses sticks dipped in ink to make his art! So don’t get too hung up on materials.
Eraser and sharpener
You need an inexpensive hand held preferably metal sharpener. There are many around but I happen to use this sharpener. I use a kneaded eraser and the one I use picks up graphite like MAGIC.
And that’s it. Those are the only tools needed for drawing for beginners!
2. INSPIRATION FOR YOUR DRAWINGS
Most of us need to see some kind of inspiration, or end result, to show us what can be done. That’s why we buy art books or go to museums.
We are inspired when we see a beautiful painting or drawing framed and hanging in a museum. We go to see the possibilities of what can be done and then we can aspire to get there. I’m not saying we’ll have work in a museum, but it’s inspiring to see what another artist can do with just paper and pencil. Or maybe a little guache or ink. We’ll get to that later.
So it’s a good idea to look at other artists work. Whether you love Rembrandt or Ruben’s sensitive pencil drawings or cartoons by Martin Rowson or Matt Groening, it’s important to see work by other artists. And why? You’ll want to understand WHY you like a particular style or even a particular artist.
When studying sketches or drawings by other artists, try to notice:
- lines: are they thick or thin? Do they have variety?
- shading: what techniques are used for shading? Or is there even shading at all?
- composition: does the subject take up most of the page? Is there a lot of white space left untouched?
- detail: how much detail is used? A cartoon can have almost no detail but accuracy is important.
- paper: what kind of paper appeals to you? By that I mean how smooth and what color. Paper comes in many colors, the majority being white or some light neutral shade.
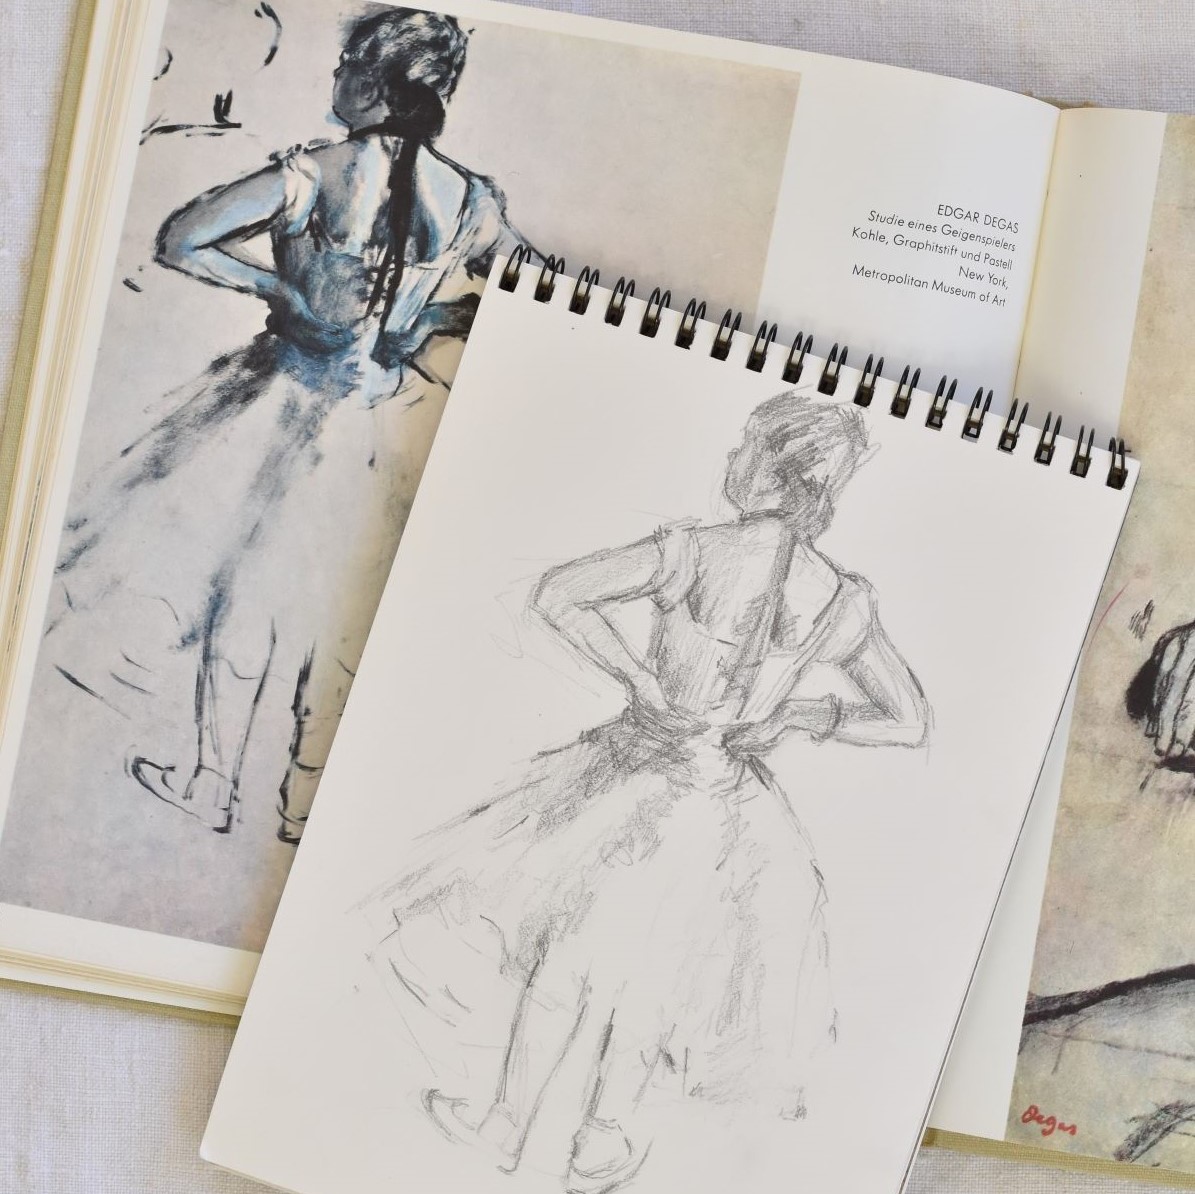
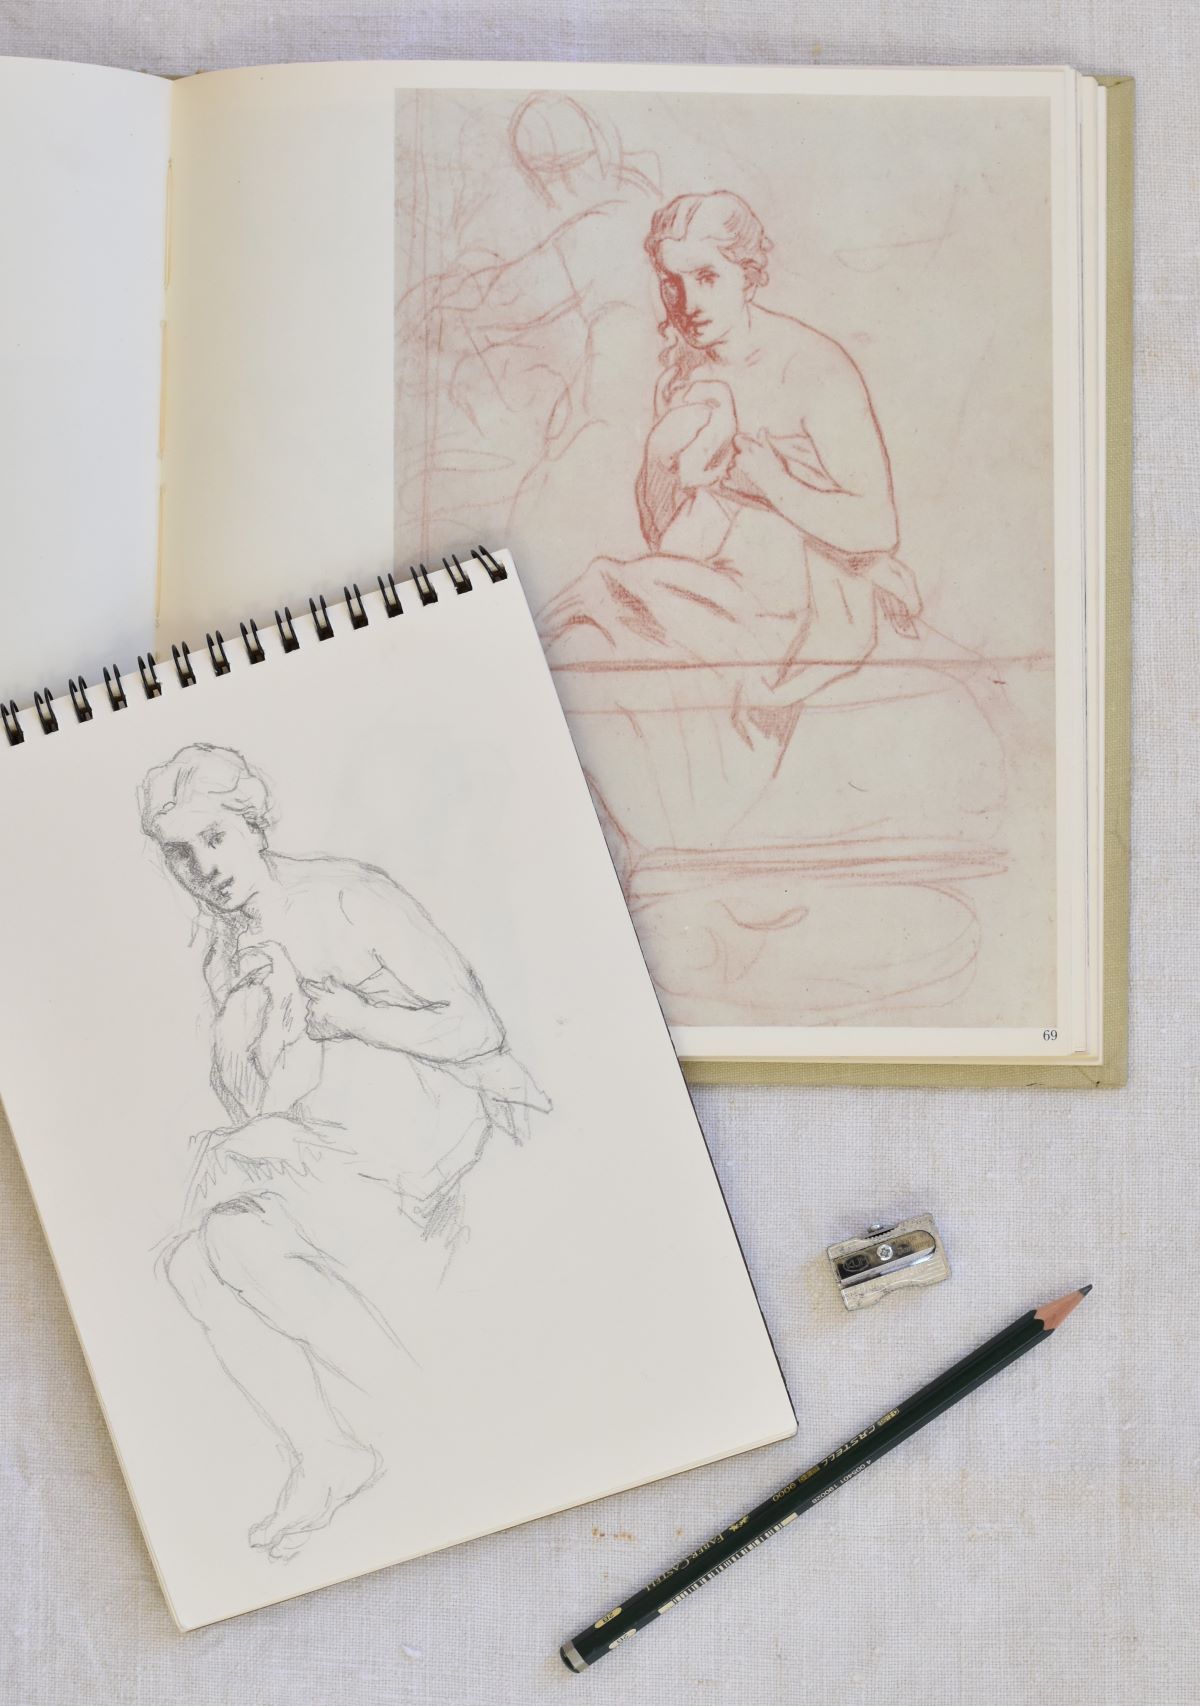
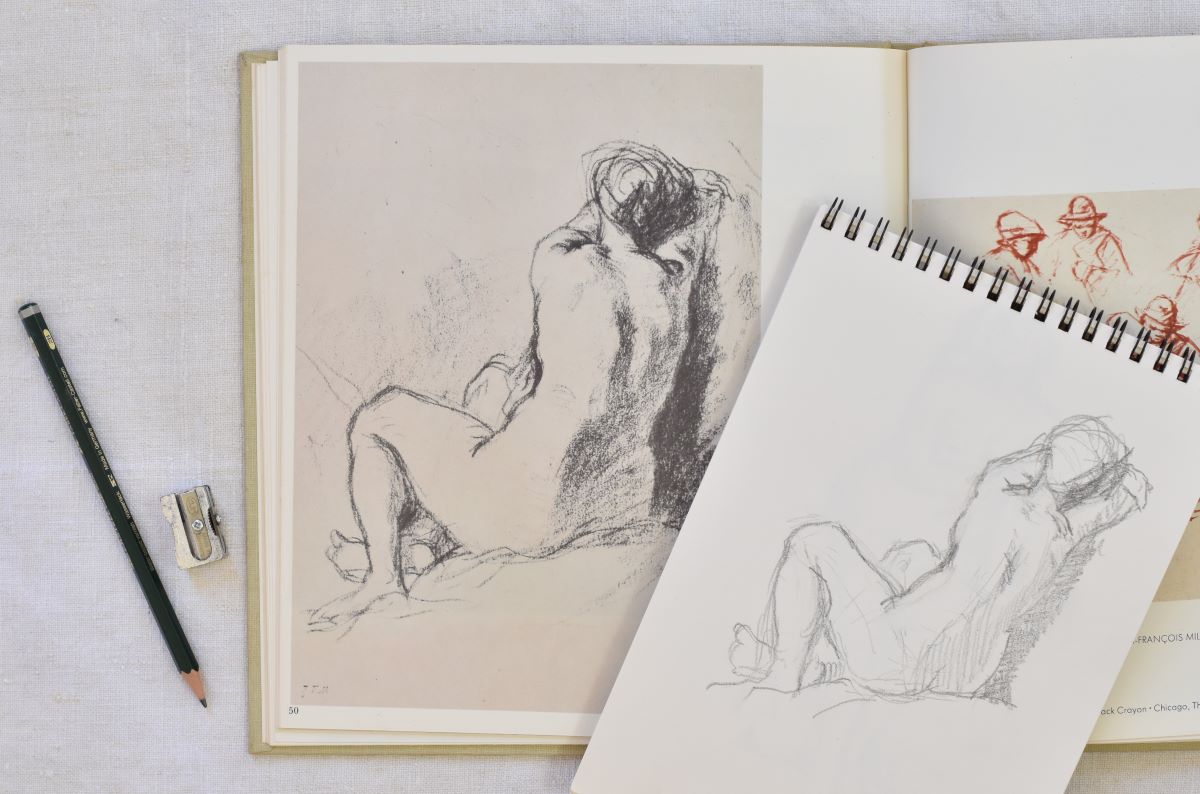
3. LEARN BY COPYING
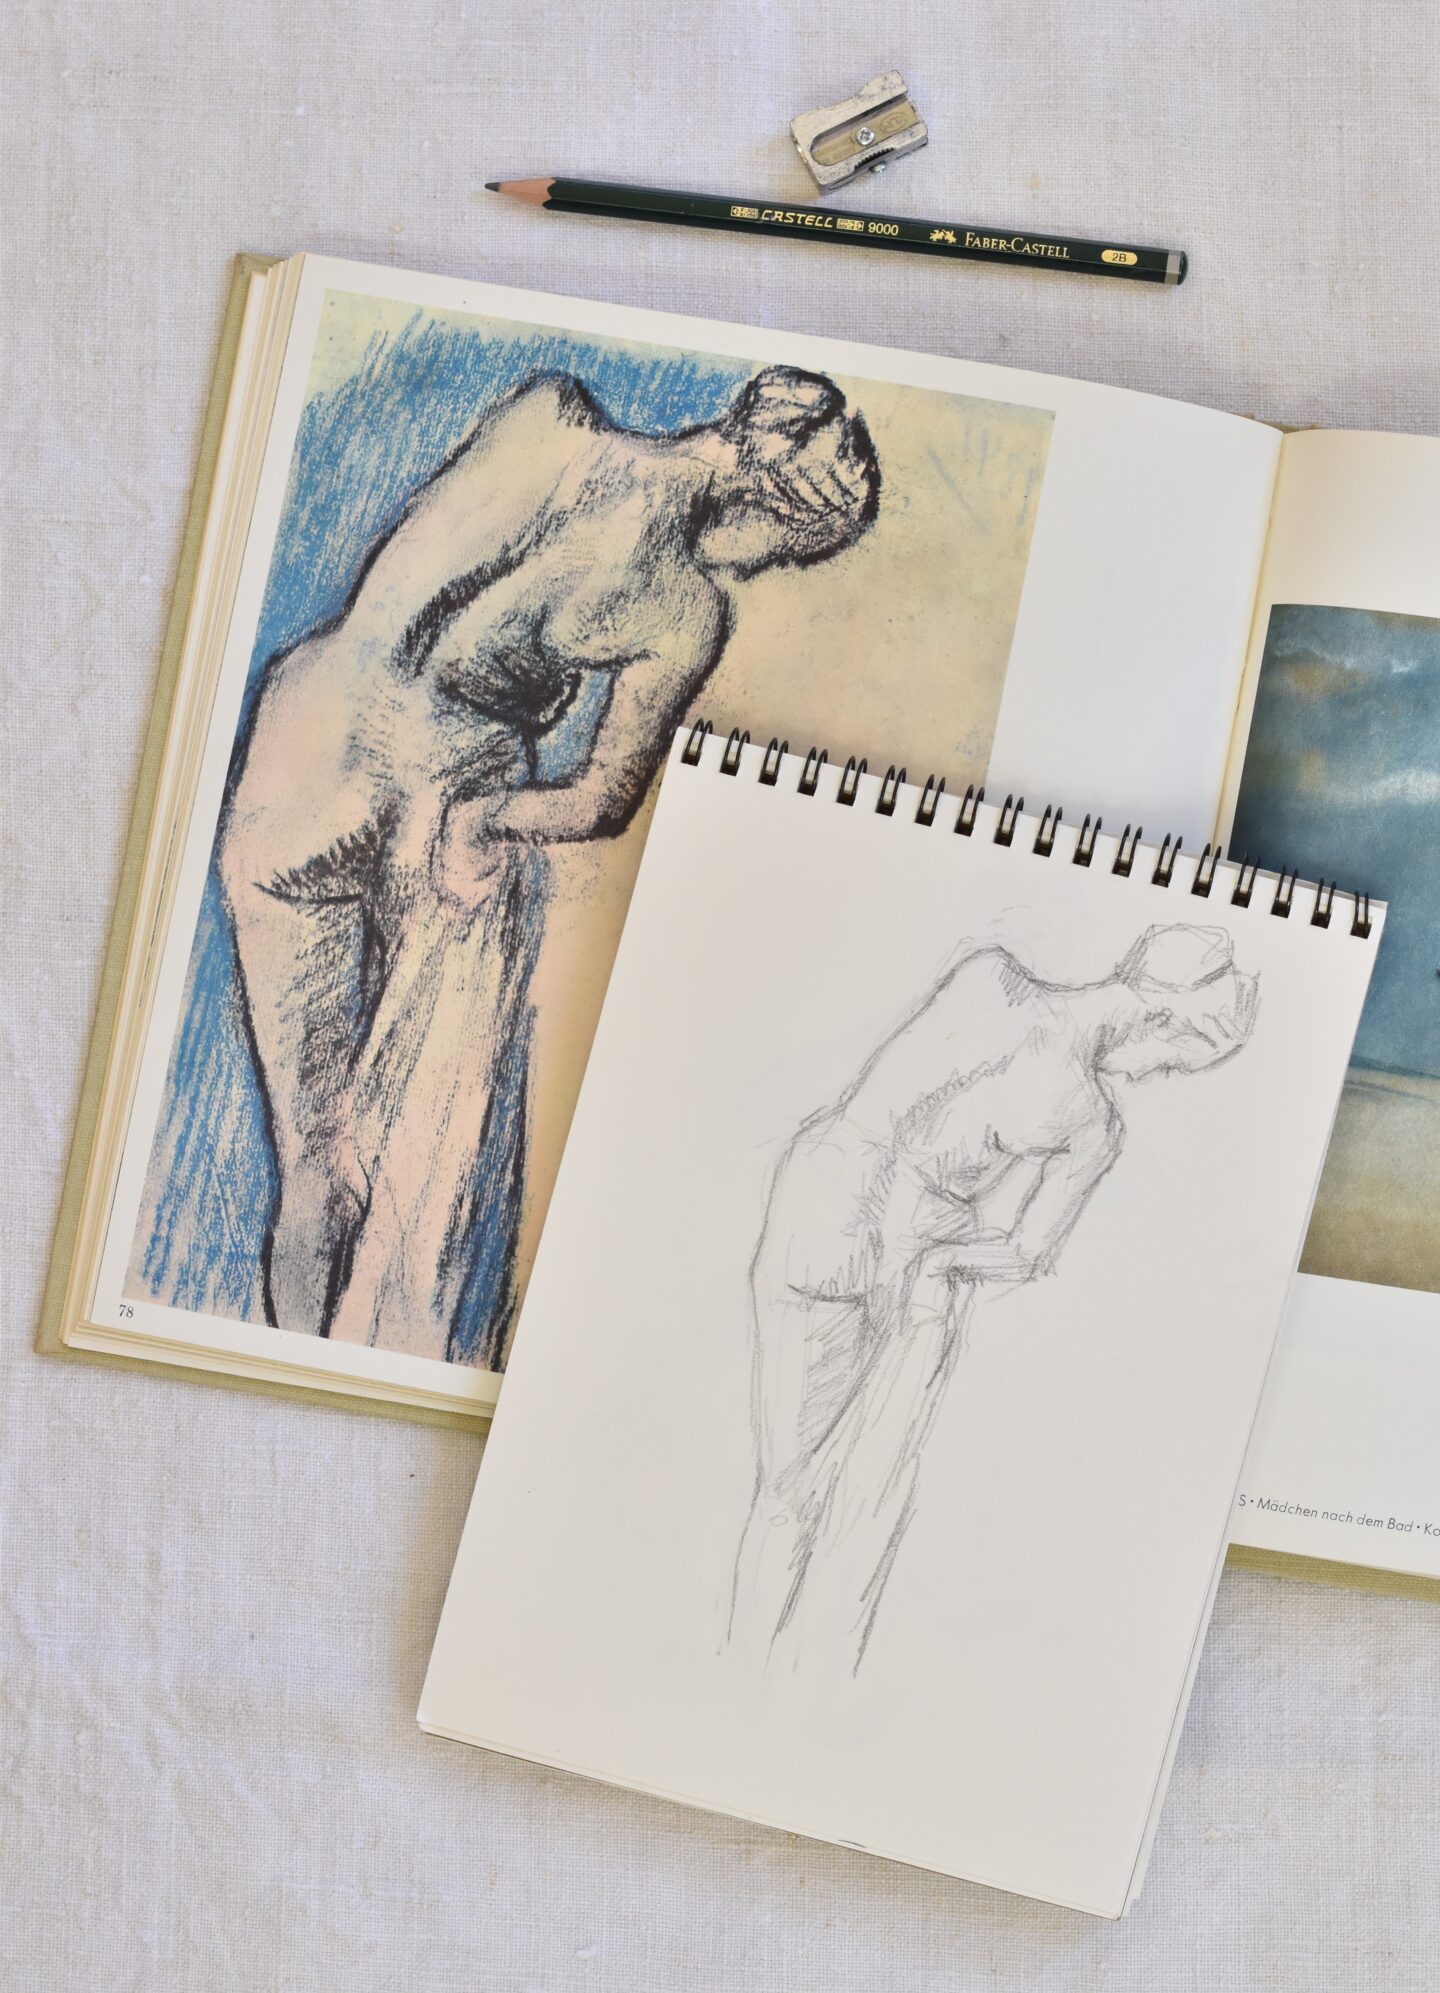
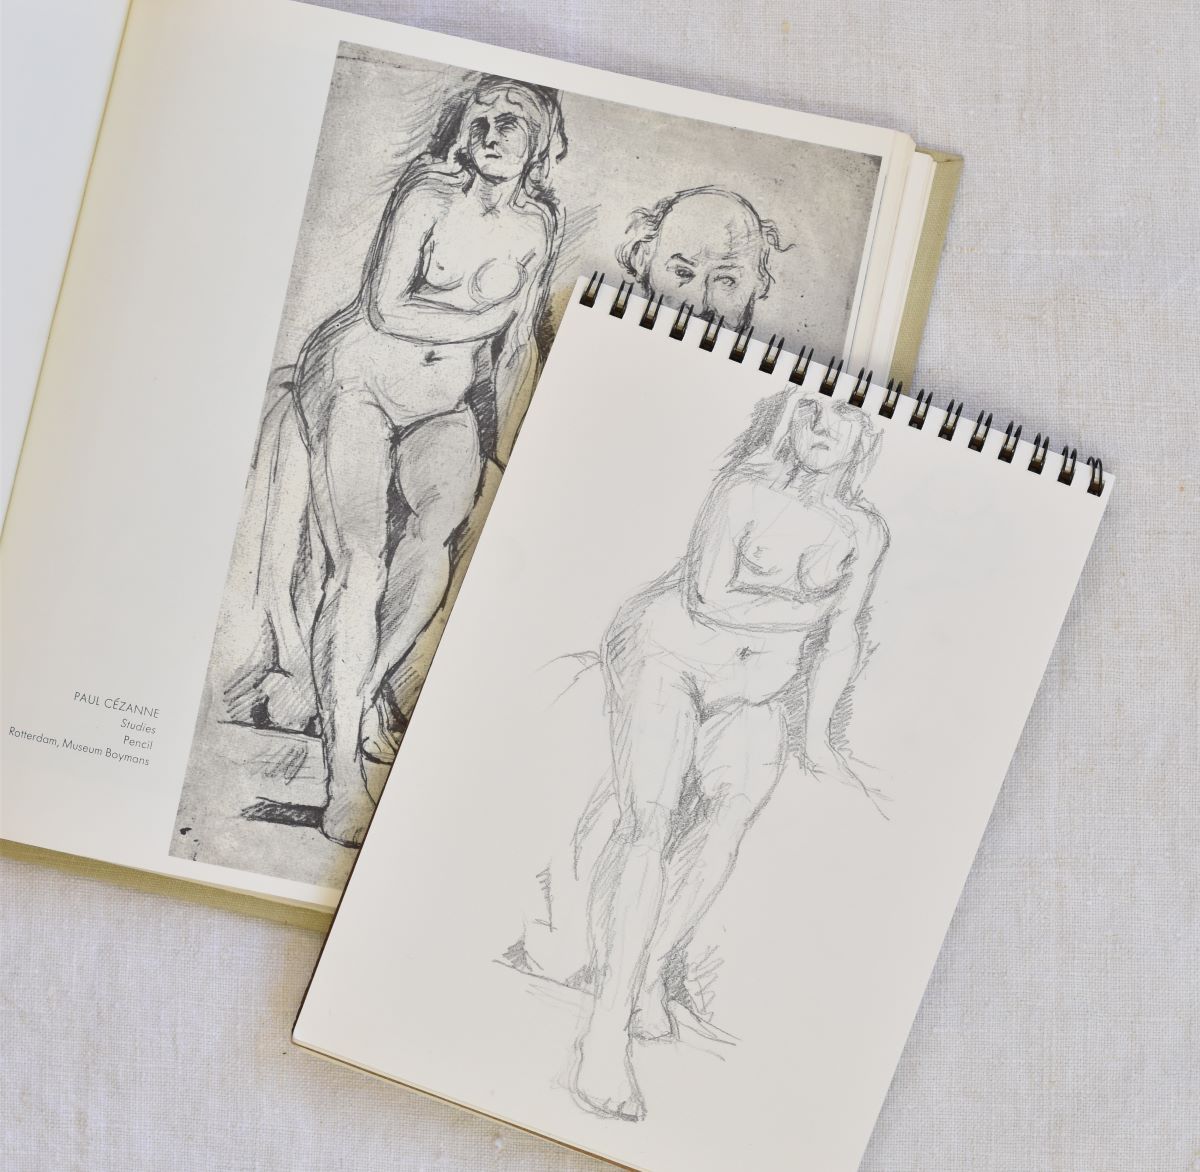
You can and should take this a step further and copy some of the works you enjoy, for your own education. This is an excellent way to REALLY get the feel for how an artist shades or how he uses lines. It’s one thing to look at and even stare at a work but a while, but quite another to copy every line and detail.
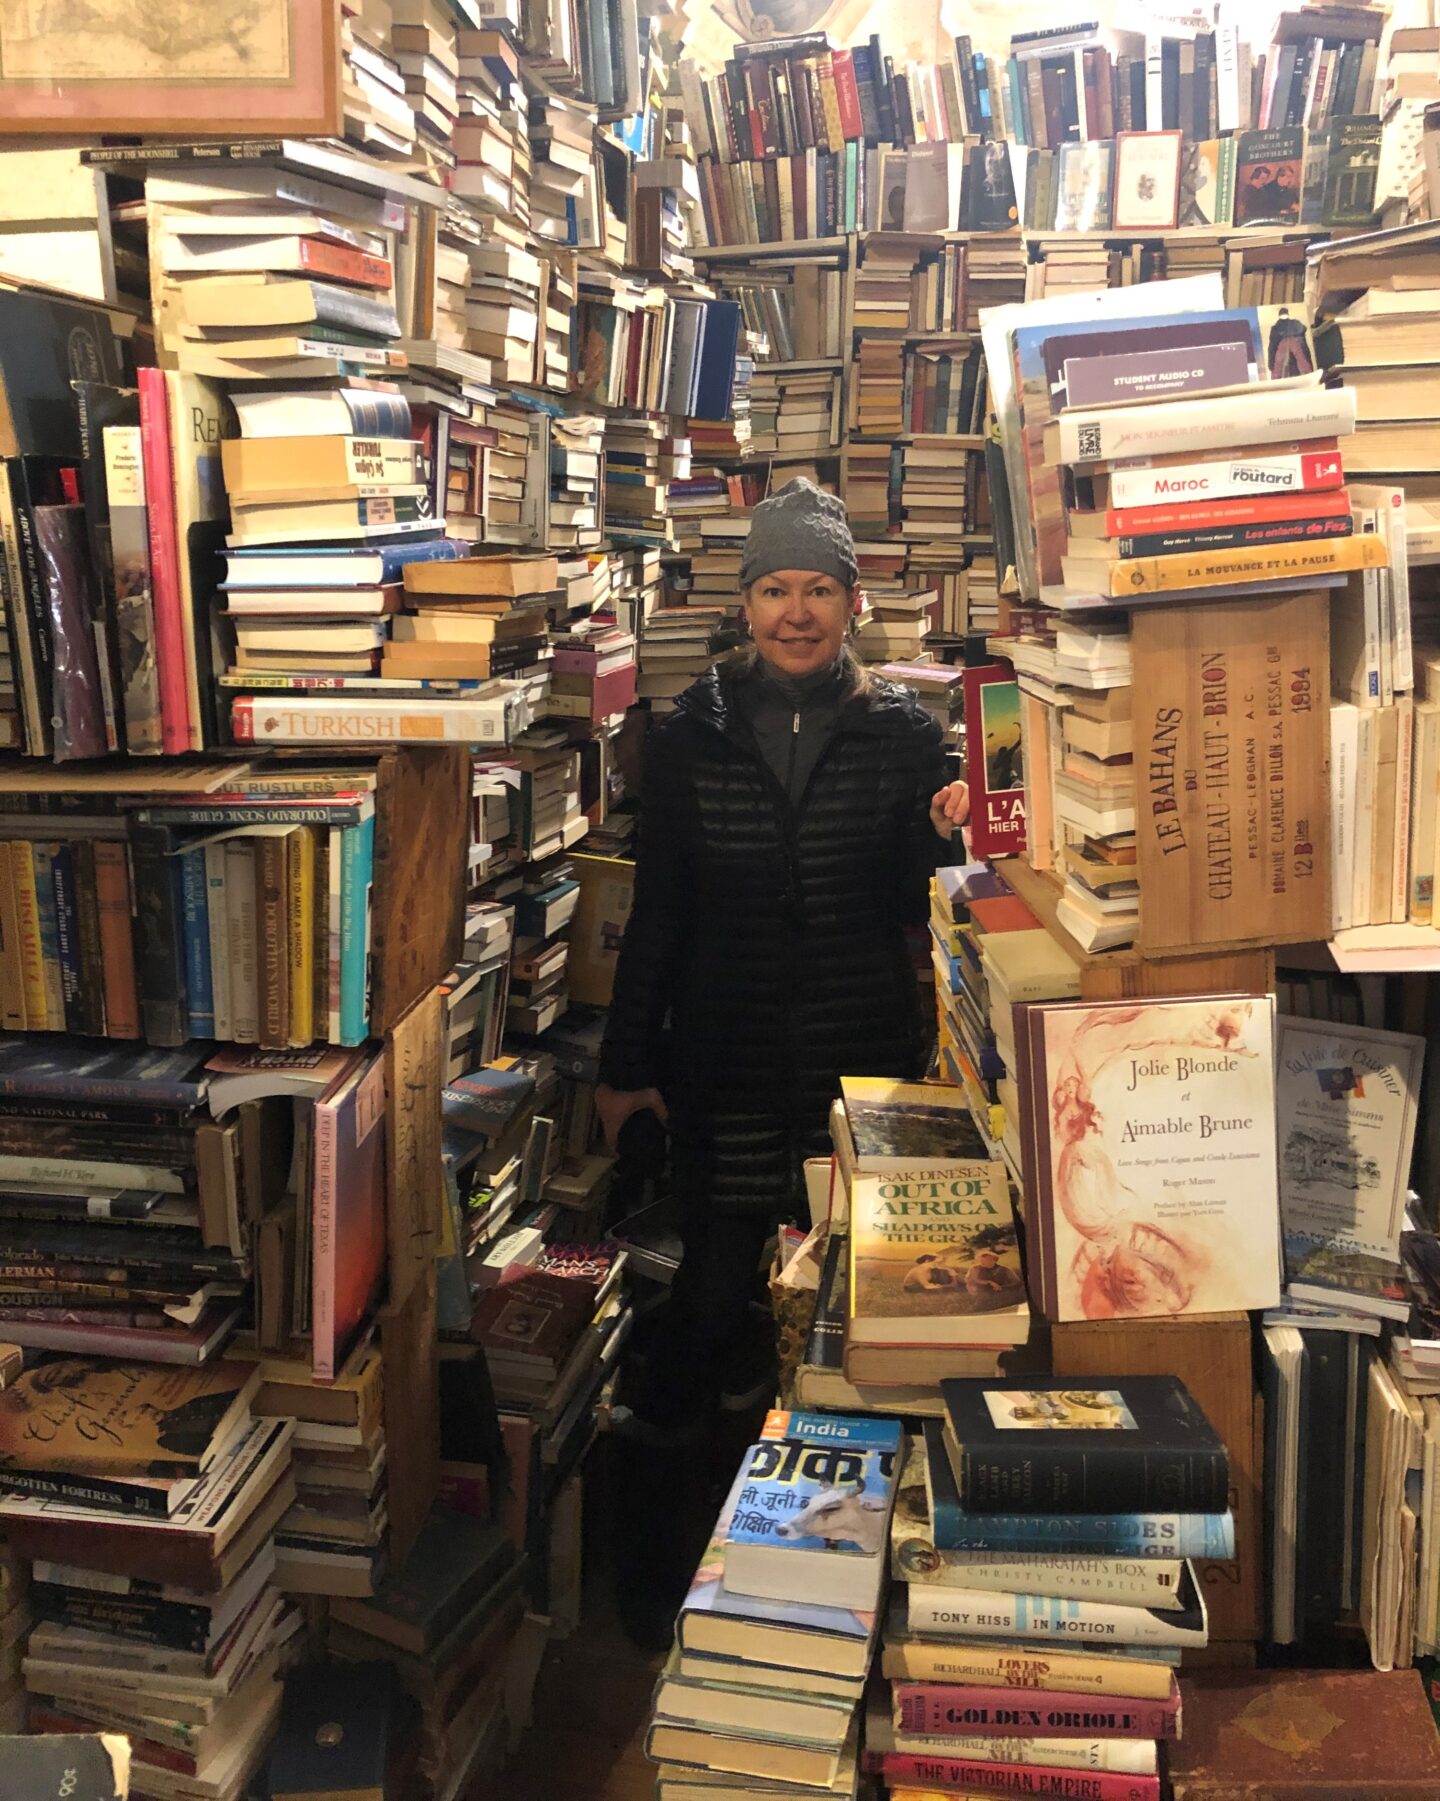
Throughout this post are some examples of copies I made. My husband and I went to New Orleans, he had meetings so I thought I would go out and sketch. I headed for the French Quarter. It was crowded and everything I wanted to sketch looked so . . . busy. So many people, so many details.
So instead of sketching I wandered into a very old dusty bookstore with packed shelves and high ceilings. I went straight to the art section, as I always do. And I found an old book full of drawings by Impressionists and decided I would take that book back to the hotel (after I got a beignet to take with me) and copy some of the beautiful drawings in the book. I had a wonderful afternoon in the hotel room copying – not tracing – drawings from the book.
DON’T MAKE THE MISTAKE i MADE
A few years ago I went to Europe on vacation with my family. I was all set to sketch. I had 2 or 3 new sketchbooks, an assortment of pencils, a few pens, eraser and sharpener. And even a pencil bag for it all. I was ready.
But it took me a week before I actually pulled out my materials and sketched! A week! Because I was so afraid of failure.
I admit, the first 2 or 3 were pretty rough and you won’t see them here. But after that I naturally worked my way into how I liked to express myself. That’s one below and you can see more sketches from that trip here.
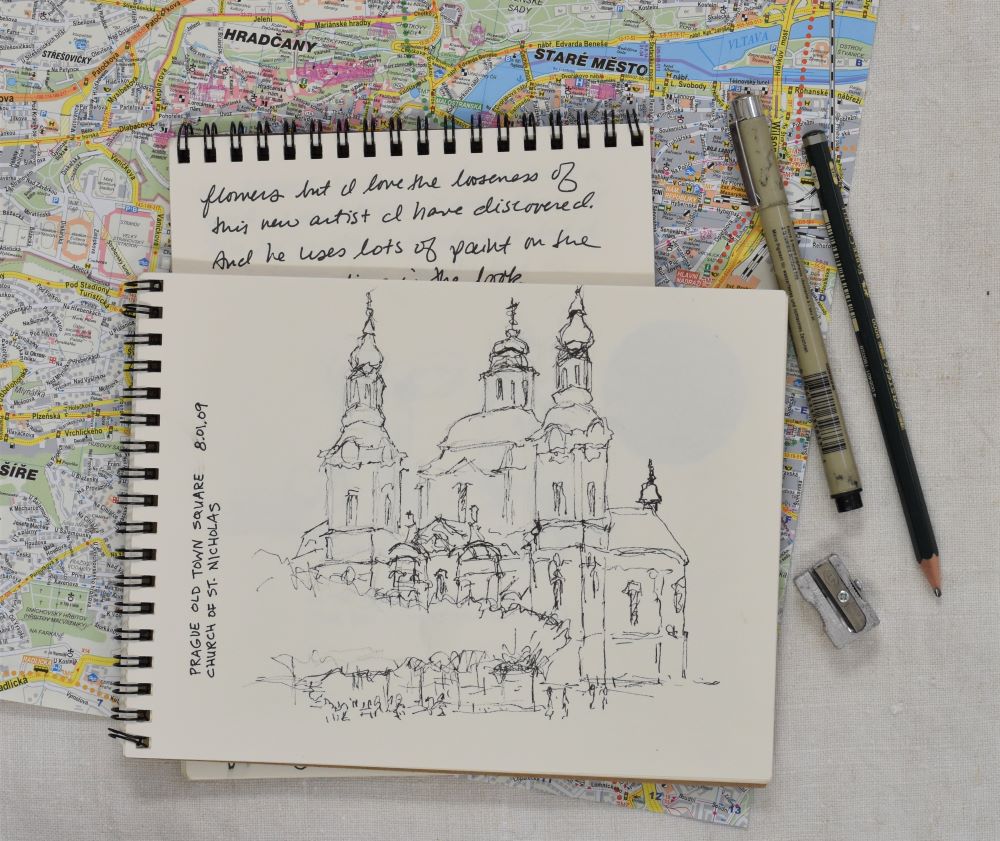
The moral of this (very short) story is not to wait! You’ll have to just jump in. Realize the first sketches you do won’t be great. Accept it. But, and here’s the secret, the quicker you get those few bad ones out of the way, the faster you’ll be on your way to making beautiful sketches that express your subject in your own unique way.
There is no right or wrong way to sketch. Well, the right way to sketch is to sketch the way YOU want to. Also remember not to compare yourself to anyone else. It’s one thing to make a copy of a famous artist to learn, but quite another to compare yourself to a famous artist. Just don’t do that!
Ink and Guache
Pen and Ink
Besides sketching in pencil it is popular to make sketches or drawings in pen and ink. This is a centuries old tradition when a pen was dipped into ink. Today artists mostly use a variety of ink pens already filled with ink, a favorite being this one here.
Guache
A light wash of guache can be added over an ink drawing. Guache is similar to water color but it’s opaque instead of transparent. It is water soluble so can be diluted with a little water to thin it to a wash and brush over parts of a pen and ink drawing for shadows or shading. You can see a little pen and ink I did with a guache wash here.
REMEMBER TO HAVE FUN!
I hope you get lots of joy from drawing and you’ve benefitted from these tips for drawing for beginners! One of the great things about sketching is that it can be a lifelong pursuit and that’s exciting. There is always something new to learn, to see and to try.
THANK YOU for such an informative & encouraging post! I’ve been trying to do more drawing and this is the most helpful post I’ve seen so far.
Thank you for the wonderful information. Honestly, I’ve also been experiencing the fear of failure – my drawing and sketches not good enough, or am I even learning and improving, but thanks to this I’m gonna try again and again while having fun.
What a wonderful comment! Thank you so much for taking the time to write and thank me for my post! I’m SO glad you found it inspiring. And I’m sure you are improving because that’s what practice does. With every stroke we make, our brain is evaluating what we are doing and we are learning from that. And remember that not every drawing is going to be great or even good, we try new things and some of it doesn’t work. We want to push to that edge to see how far we can go with something and have it work, sometimes the only way to do that is to push past that edge and create something that we don’t think is good. I’ve been drawing all my life and I still do that, it’s good to do that. That’s how we grow! Good luck and I hope you keep the fun in drawing!!! 🙂