In this post I will walk you through all the steps you need to build a Pochade box. The advantage is that you’ll have a Pochade box that is customized to your needs. You’ll learn what you like and don’t like about Pochade boxes. This will be valuable information if you decide to ever buy one. The downside is that it’ll take some time to build a Pochade box.
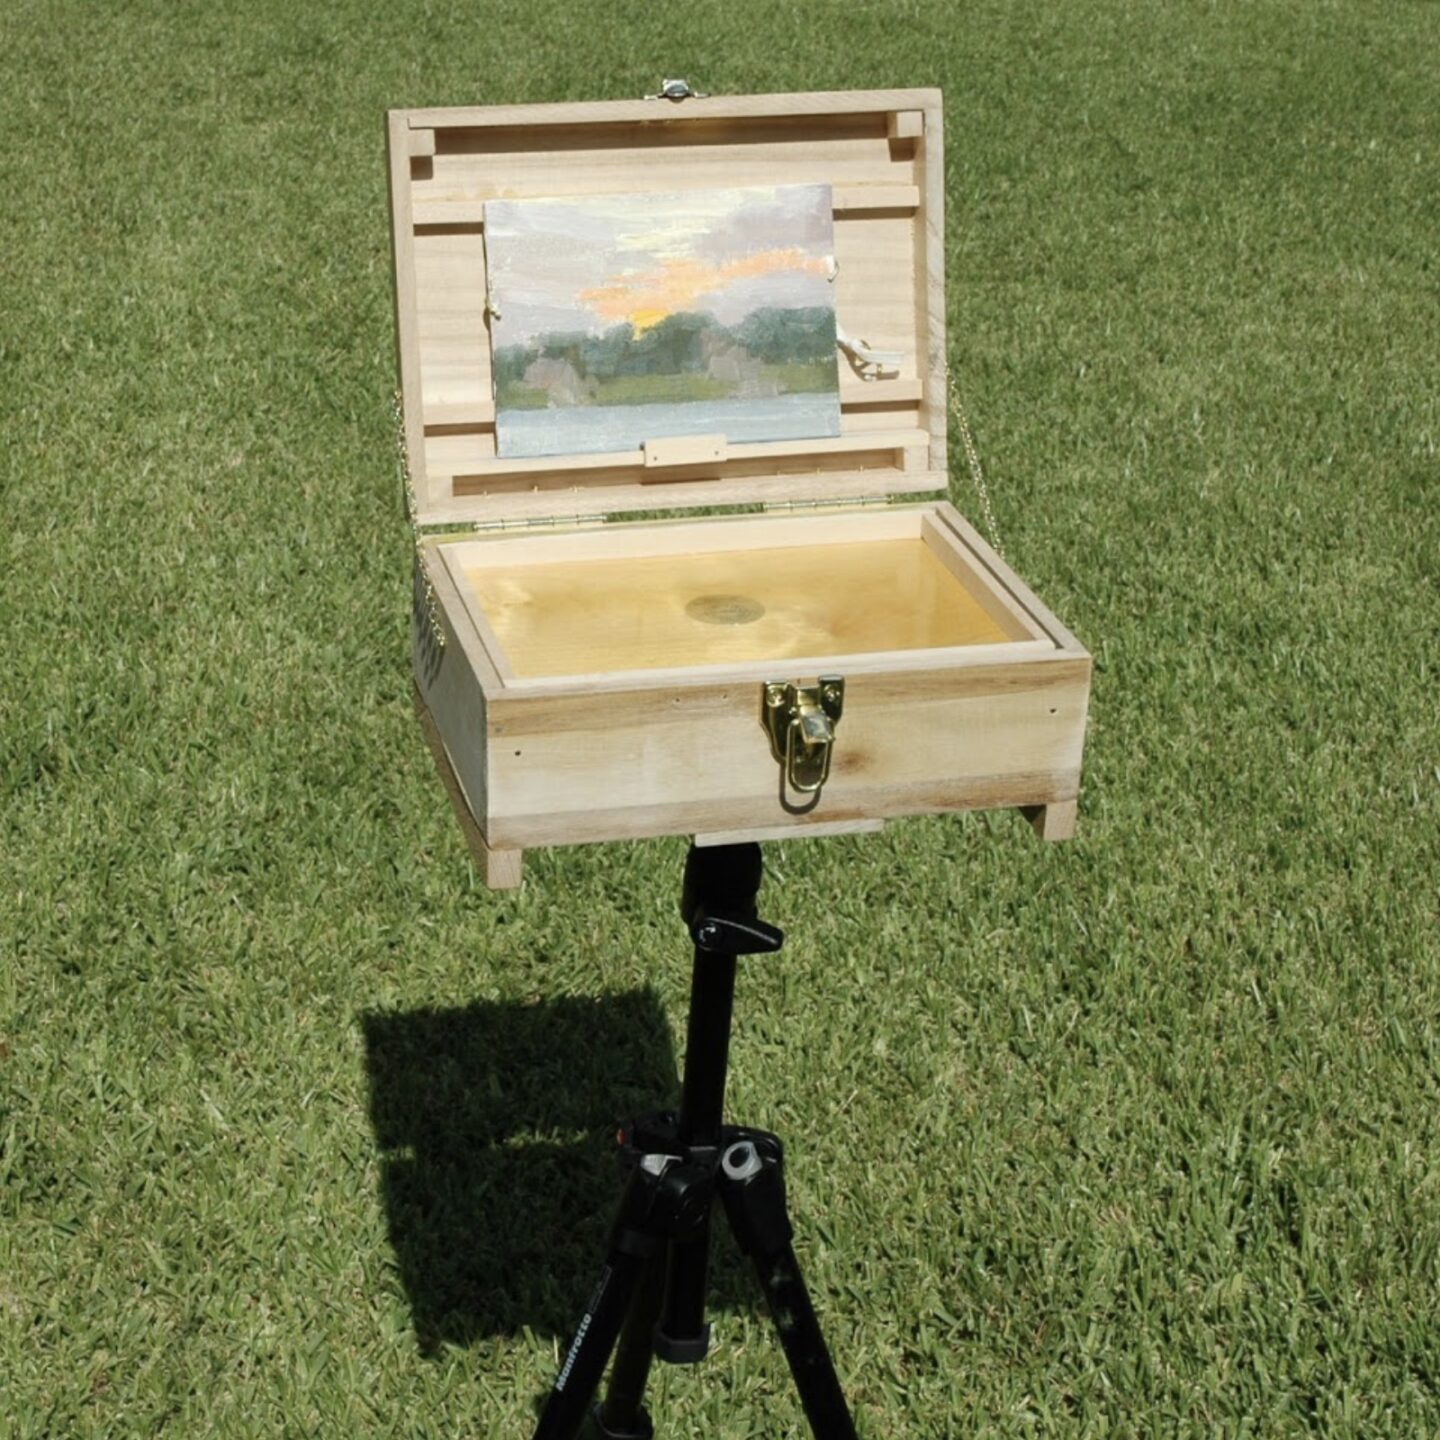
Building the Pochade box wasn’t complicated, each step is actually fairly simple, and my only complaint is that it was very time consuming. But if you like spending your time in hardware stores, and and don’t mind searching out just the right little peice of hardware, then read on. Above is a photo of the finished pochade box, which works beautifully.
Before you start . . . . !
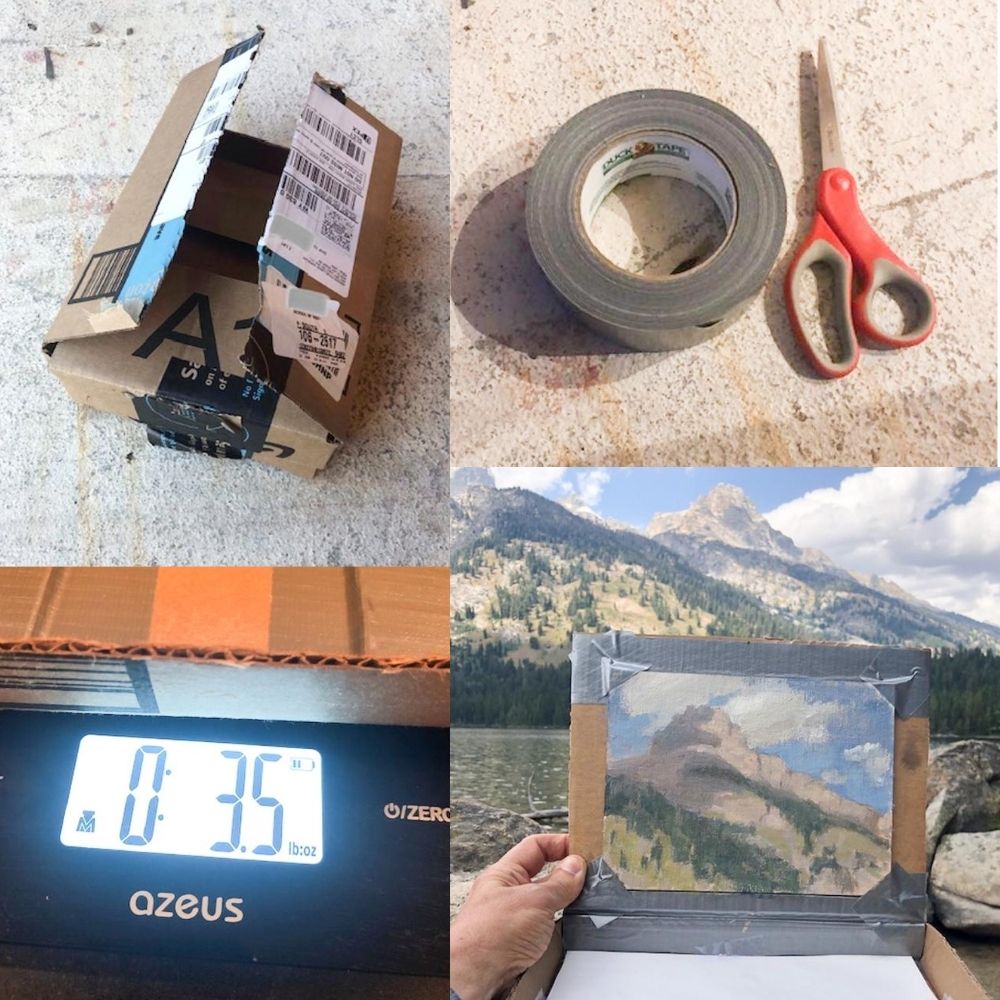
I made another one recently. I made a pochade box out of a cardboard Amazon box because I wanted a LIGHTWEIGHT pochade box. It only weighs 3.5 ounces and super simple, easy (it took me less than an hour) and cheap to make. I made it in my studio with only the box, scissors and duct tape. If this is of interest to you, you can see how I did it: easy lightweight pochade box. If you want to try the wooden one, continue below the image.
Wood pochade box instructions continue here . . .
Finding a cigar box
Below is the box I started with. I went to a large liquor store here in Houston that also sells cigars. I was looking for a cigar box, not liquor. 🙂 They only had cardboard cigar boxes but I found this wonderfully sized box that originally held a bottle of tequila. Once emptied, the liquor store sells these boxes for $5. I got a special deal of $3 because I gave the 4 little shot glasses in the box to the cashier after she admired them.
You could use any box that is hinged, or a box you could add hinges to.
Adjusting the size of the box
I thought the box was too long so I drew a line with a pencil and cut off about 3 inches. I just used a small hand saw for this.
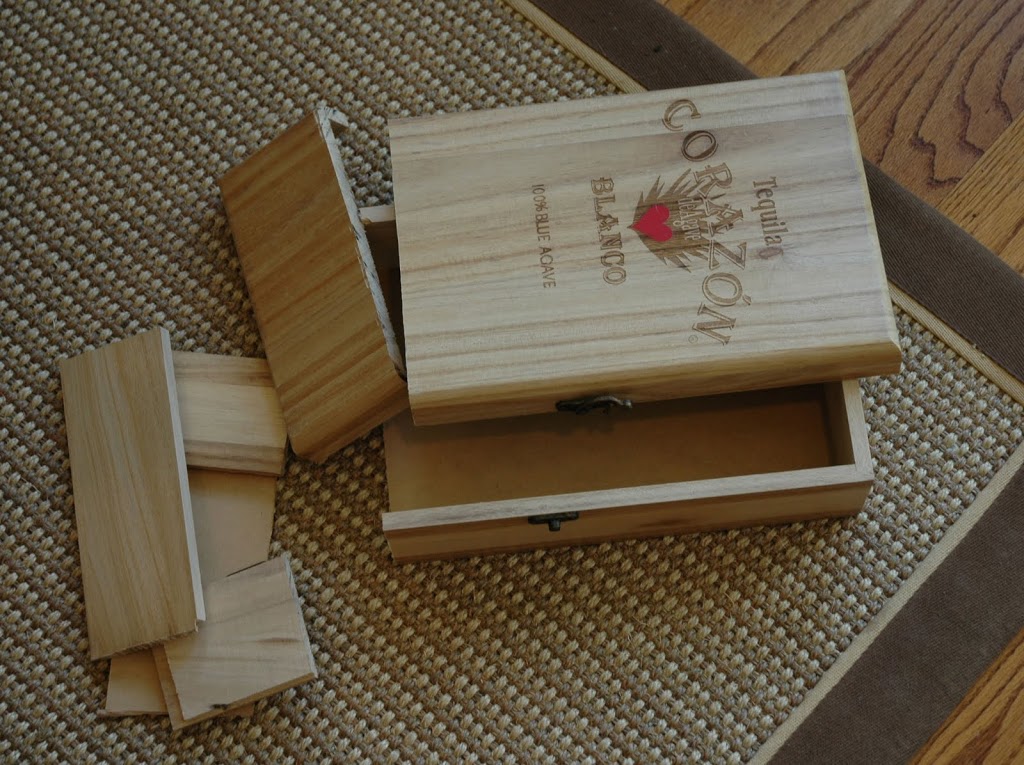
I cut new sides out of those scraps and glued and nailed them on to get a better sized box.
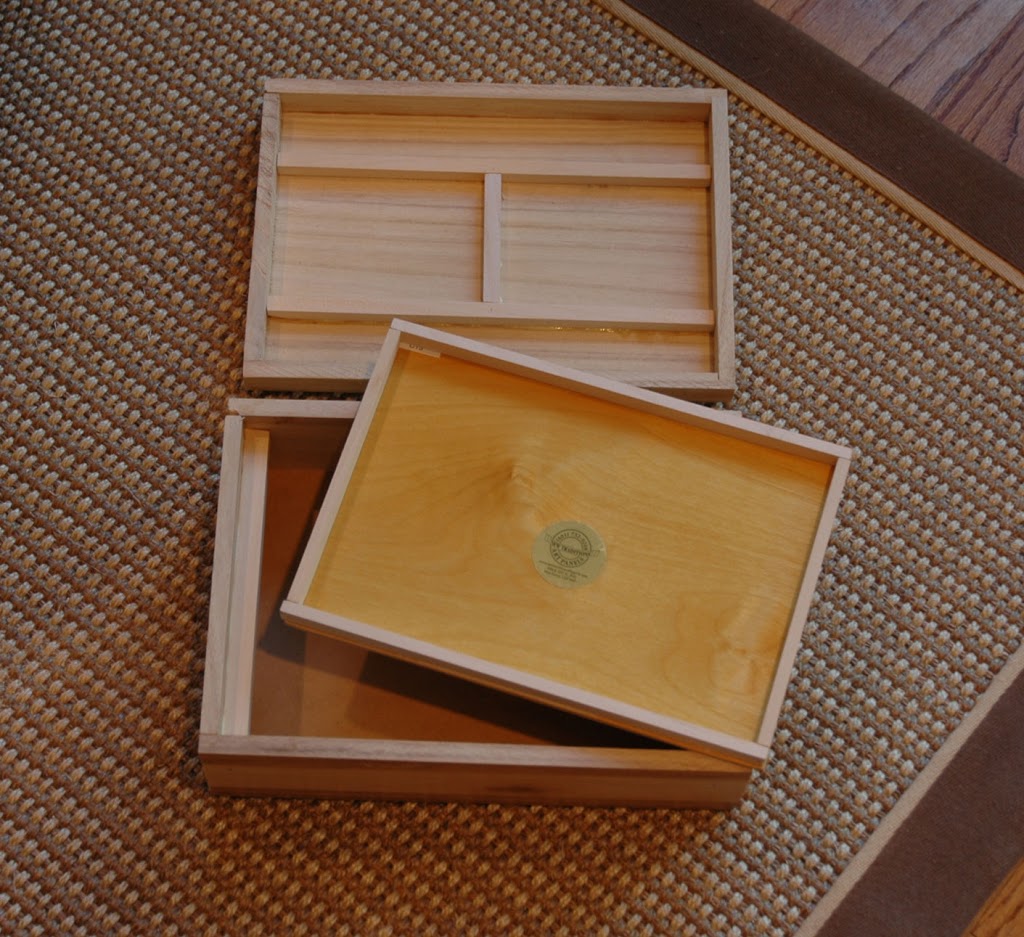
The palette
Below is what our kitchen table looked like while I was working on this box! A Pochade box needs a place to squeeze out your paint: the palette. I used an 8″x10″ piece of birch for my palette. I bought little 1/4″x1/2″ strips of wood at the art store and cut those to make a little wall around the palette. I glued two 1/2″x1/2″ strips of wood in the bottom of the box, about 3/4″ down from the top of the box, for the palette to rest on.
At the bottom of this post is a link to information about putting glass on your palette for easy clean up. This is a later edit and now I ALWAYS use glass. You’ll want to know about the glass palette option.
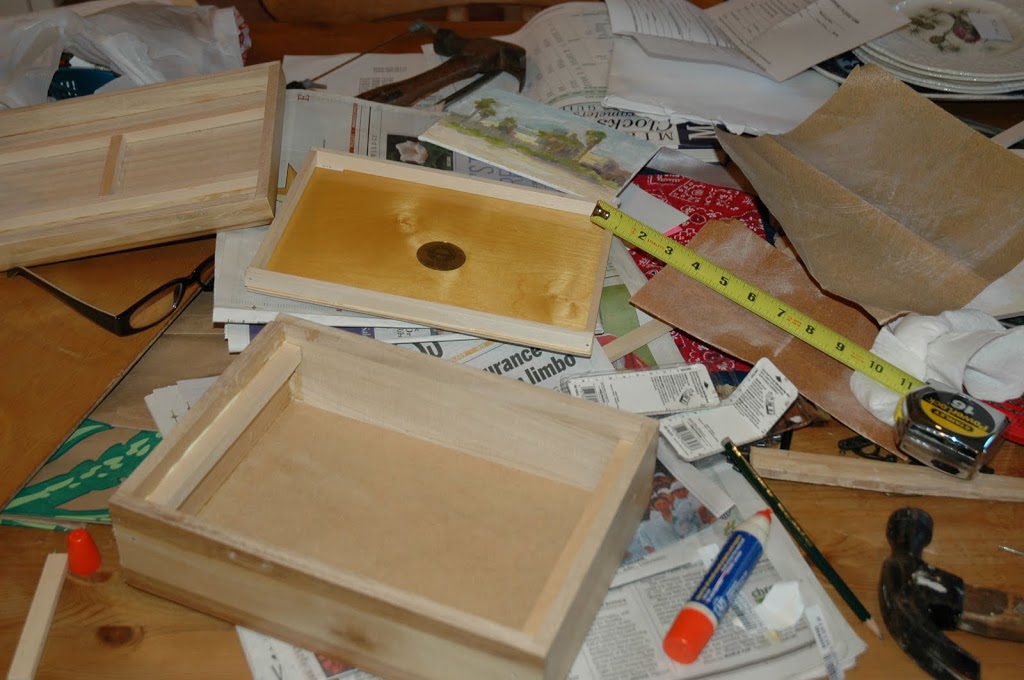
All the cutting, glueing and nailing was done. I was still in the “honeymoon phase” of making my pochade box. Look how pretty it looks! (below)
Attaching the top to the bottom
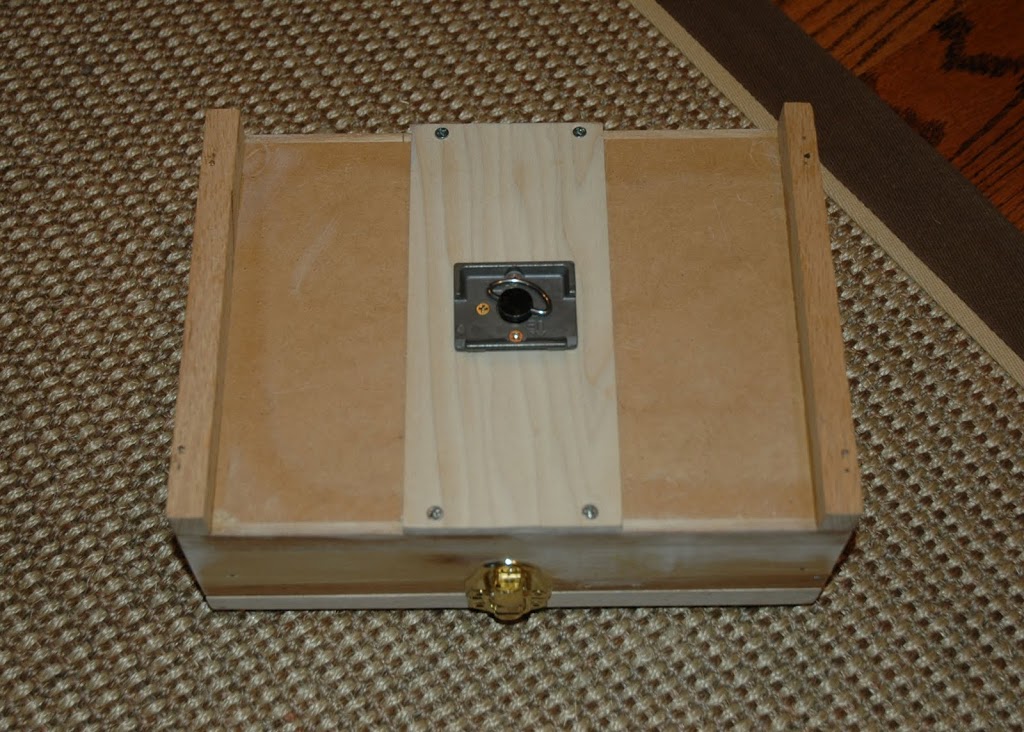
But that’s when the trouble started. I eventually, and I do mean eventually, found the right sized hinges and front clasp (at Home Depot), I bought some little lengths of chain and screwed them in to hold the top from flopping all the way back (those came from a local hardware store), I bought just the right sized screws so they wouldn’t go through the wood. But then some of them did go through the wood so I had to go back to the hardware store for a file to file down the tips of the screws that went through the wood. Oh, needed special wood glue. Tiny nails. Tiny but longer. Not that long. Went to a specialty hardware store looking for clasps and bought one which I didn’t end up using. Considered going back to the liquor store . . . . just kidding.
By the end of it I counted ELEVEN trips to FOUR different hardware stores plus the art store for the lightweight strips of wood. The lesson here is to measure carefully before you go to the hardware store, or better yet, bring along your Pochade box.
Attaching canvas to Pochade box for painting
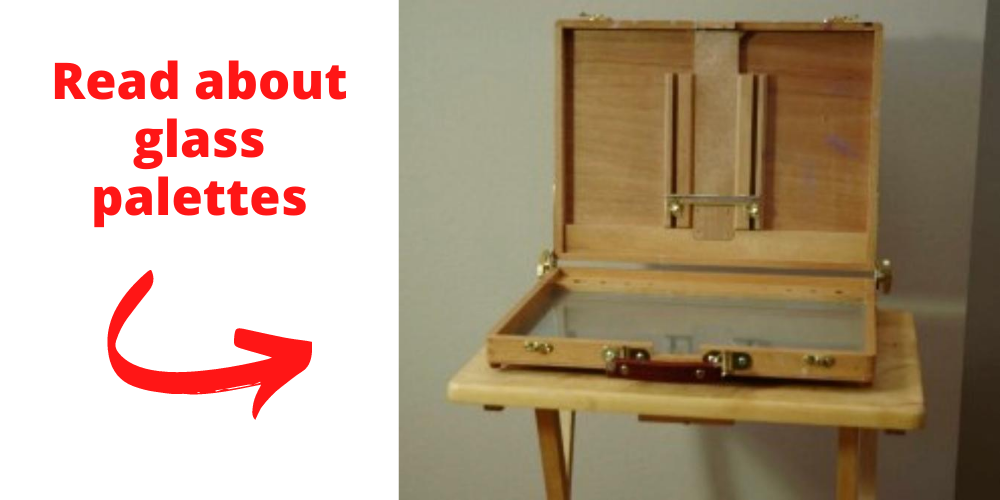
The problem still remained of how to attach the canvas to the inside of the top of the pochade box while painting. I used two hooks made from S-hooks and tied a piece of elastic to each one. I had to use plyers to open up the S-hooks a bit so they would hook around my canvas panels. Then I drilled a hole through the middle vertical bar and put the elastic through that hole. Now each hook attaches to a side of the canvas and the elastic keeps it in place. I even tied on an additional hook a little farther out on the elastic for bigger canvas. (You can see the hooks and elastic in the photo at the very bottom.)
The last thing I did was attach my quick release tripod mount to the bottom of the pochade box.
Added strips for tabletop
And then of course I found I needed taller legs so I could put this on a table top if I wanted. I cut two strips of wood and glued and nailed each one on the side. When you build a Pochade box, you could leave these strips off.
Below is another photo of the finished product. You can see the hooks holding the canvas in place. That’s a 5″x7″ canvas. You can even see a little of the elastic to the right of the canvas with another hook, that’s for an 8″x10″ canvas.
Add glass to the palette
I now always have glass put on my palettes. It’s simple and easy. (Especially compared to making the pochade box!) If you’d like to read more about the advantages of having a glass palette, see my post on glass palettes for artists. (This is a later edit and something I’ve learned since making this pochade box).
Summary
I guess the advantage of building this myself, besides saving a couple hundred dollars, was that now I can use this one for a while and decide what I like about it and what I don’t before I order a ready made one. So, if you decide to build a Pochade box, it takes lots of thought but it’s nice to have exactly what I want. And it’s great to be out of the dark ages of using my old french easel, this new one with the wonderful lightweight Manfrotto tripod I got works beautifully.
I hope this post has helped show you how to build a pochade box. Good luck!
